Vegan Blueberry Banana Muffins (Award Winning!!)
Who doesn’t love muffins? What if I told you you can make this recipe and feel GOOD while you’re eating them knowing they are healthy and full of good ingredients?? These are the BEST vegan muffins I have EVER made and they even won a recipe contest at Garden of Life, which is my most favorite supplement company; from vitamins to vegan protein powder packed full of plant-based goodness. They make amazing products and I recommend you check them out.

And after you check them out…make these muffins 🙂 ❤

Would you believe me when I say the secret ingredients that make these so moist and delicious is AVOCADO and VEGAN SOUR CREAM?! I know….It is crazy…but just trust me 😀

Ingredients:
•½ ripe medium/large avocado, mashed very well
•½ very ripe banana, mashed
•½ cup granulated sugar
•¼ cup melted Garden of Life coconut oil
•¼ cup melted vegan butter (i used Earth Balance)
•⅓ cup vegan sour cream
•¼ cup light brown sugar, packed
•2 teaspoons vanilla extract
•1 teaspoon cinnamon
•½ teaspoon nutmeg
•pinch salt, optional
•1 cup all-purpose flour
•1 tablespoon flaxmeal
•1 tablespoon baking powder
•1 cup frozen blueberries (keep them frozen, do not thaw them) **fresh berries can also be used, but cooking time may need to be decreased
•2 tablespoons all-purpose flour, for tossing berries
Directions:
Preheat oven to 400F.
Spray 9 cups in a non-stick muffin pan with floured cooking spray, or grease and flour the pan and set aside.
In a large mixing bowl, mash the avocado and banana very well.
Add the granulated sugar, oil, sour cream, brown sugar, vanilla, cinnamon, nutmeg, optional salt, and whisk to combine.
Add flour and baking powder and stir until JUST combined – DO NOT overmix!! Set bowl aside.
In a small bowl, toss blueberries with 2 tablespoons flour ** helps prevents them from sinking as much while baking.
Gently fold blueberries into batter along with any loose flour from tossing berries.
Divide batter evenly among 9 cups in prepared pan. Each cavity should be filled about 3/4-ish full.
** I know 9 is an odd number but when I made this recipe the first time and made 12 muffins, they were too small! I like bigger muffins.**
Bake at 400F for 10 minutes.
Lower the oven temperature to 350F and bake for another 17 to 20 minutes, or until muffins are done.
If using fresh berries, your baking time could be a few minutes less.
Muffins are done when golden and a toothpick inserted in the center should come out clean, or with a few moist crumbs, but no batter.
Allow muffins to cool in pan for about 10-12 minutes before removing. The cooler they are, the easier they come out of the pan.
Eat. Enjoy. Love.
Lemon Lavender Cookies (vegan)
I’ve been enjoying playing with vegan baking and cookies are such a great way to experiment! I was in the mood for something lemony and as I was whipping up this batter I thought ‘how about lavender lemon!’
Ta-da!!! Lavender Lemon Cookies 😀 They are light and chewy and delicious and I am having a hard time not eating ALL of them!!!
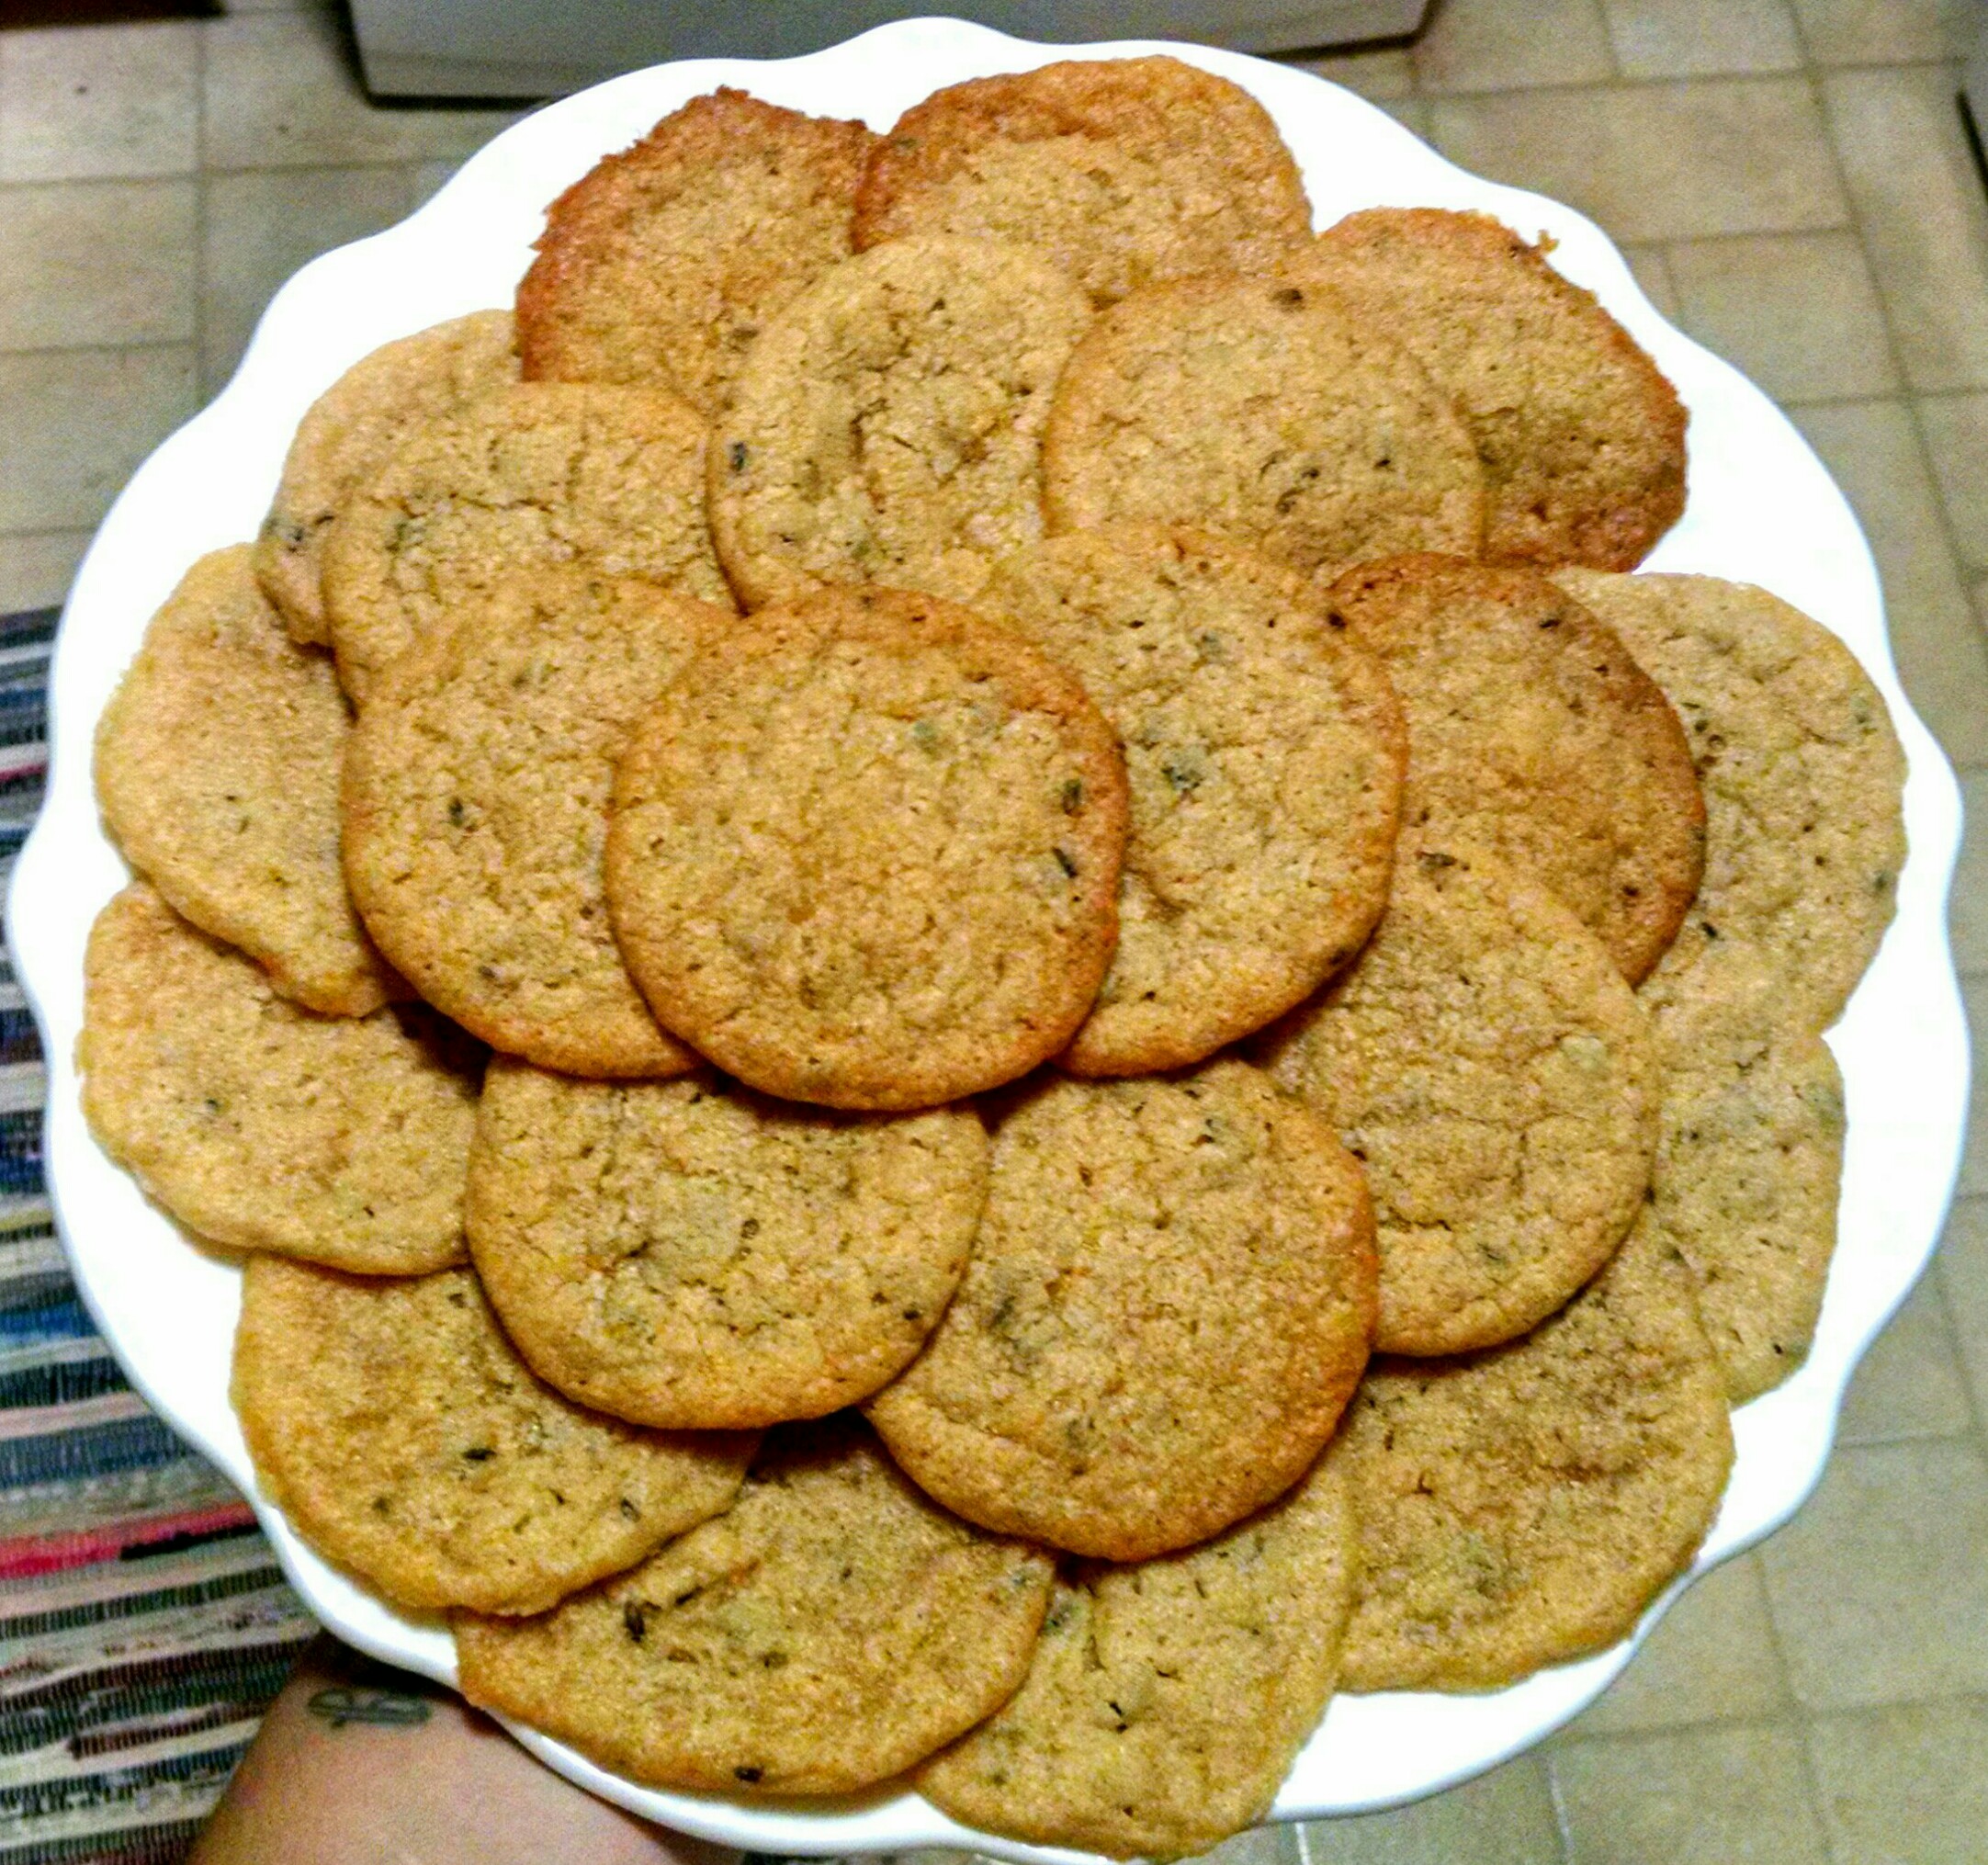
These are also super fast to make so they are perfect for making any time you are in the mood for a treat ❤
INGREDIENTS:
•½ cup Earth Balance vegan butter (or other vegan butter)
•1 cup sugar
•1tsp vanilla extract
•1Tbs lemon zest
•1Tbs lemon juice
•¼tsp salt
•1¾ cups flour
•1Tbs dried lavender flowers
•¼tsp baking powder
•⅛tsp baking soda
DIRECTIONS:
Preheat oven to 350°
Mix first 6 ingredients together until smooth.
Add flour, flowers, baking powder, & baking soda and mix again.
Scoop tablespoon sized pieces of dough onto parchment paper lined cookie sheets, 2 inches apart. (Seriously 2 inches…these will spread and touch if too close!)
Bake for 12-17 minutes, or until they begin to brown. **They will take closer to the 17 minutes if you use the airbake cookie sheets** Basically, you just want them to start to brown!
Cool for 5 minutes on the cookie sheet then move to a cooling rack.
Eat. Enjoy. Love.
Yellow Split Pea Soup (vegan)
- It’s Fall and that means I feel like making soup every week!!! So…I might just do that 🙂
- Behold…week 1 of soup season:


I have posted a split pea soup recipe before but it used bacon and butter so I wanted to tweak it to be even more delicious while following a plant-based approach. The result is DELICIOUS!! I use my immersion blender to help give the soup a “creamy” texture and the flavors are so simple but so, so tasty…especially with a big chunk of crusty bread to dip into it!
- One day I even ate some leftovers with some steamed broccoli tossed in! Another day, I tossed in spinach! You can be creative with a soup this simple ❤
- Did I mention it is SUPER EASY to make? Well, it is! Simple, delicious, versatile, AND healthy…come on. Make this ASAP!!
- **I love the color of yellow split peas. But you can totally use green if you prefer**
- INGREDIENTS:
- •1lb of yellow split peas
- •4-5 carrots
- •2-3 stalks celery
- •1 onion
- •2Tbs garlic, minced
- •1Tbs olive oil
- •½ bag of frozen corn (NOT canned!)
- •6 cups water or veggie broth
- •Vegetable bouillon (if using water)
- •Seasonings to your liking (I just used salt & pepper)
DIRECTIONS:
Rinse your split peas thoroughly and set aside for now.
- Slice up onion, carrot, and celery and saute in olive oil until beginning to soften. +/-5-7 minutes usually does the trick. Set pan aside
- In a large stock pot, add water or broth, split peas, seasonings, bouillons (if using water), and garlic.
- Bring to a boil, reduce heat and cook on medium for 30 minutes or until peas are soft and start to fall apart.
- Add in all the veggies including the corn and cook for another 5-10 minutes.
- I use my immersion blender to blend the soup about 50%. I like some chunks left but like the texture of the soup better slightly blended…makes it feel “creamier”. You can also blend the soup in batches in a standard blender. (Be sure you dont fill it too much, and just loosely hold the lid on with a towel over it to avoid a messy disaster!) BUT, you can also simply skip the blending step if you like.
- **You may need to add some additional water if you like yours “soupier”**
- Stores in the fridge for a good solid week. And freeze great too so I like to double the recipe and freeze half!!
- Eat. Enjoy. Love.
Chickpea Flour “Omelet”
I love savory things for breakfast. Sometimes I really miss a big pile of scrambled eggs and veggies…so what do I do? Toast with avocado is great. Oatmeal and smooties are good, also. But what if I want something…more special?
Enter: The chickpea (garbanzo bean) flour “omelet”
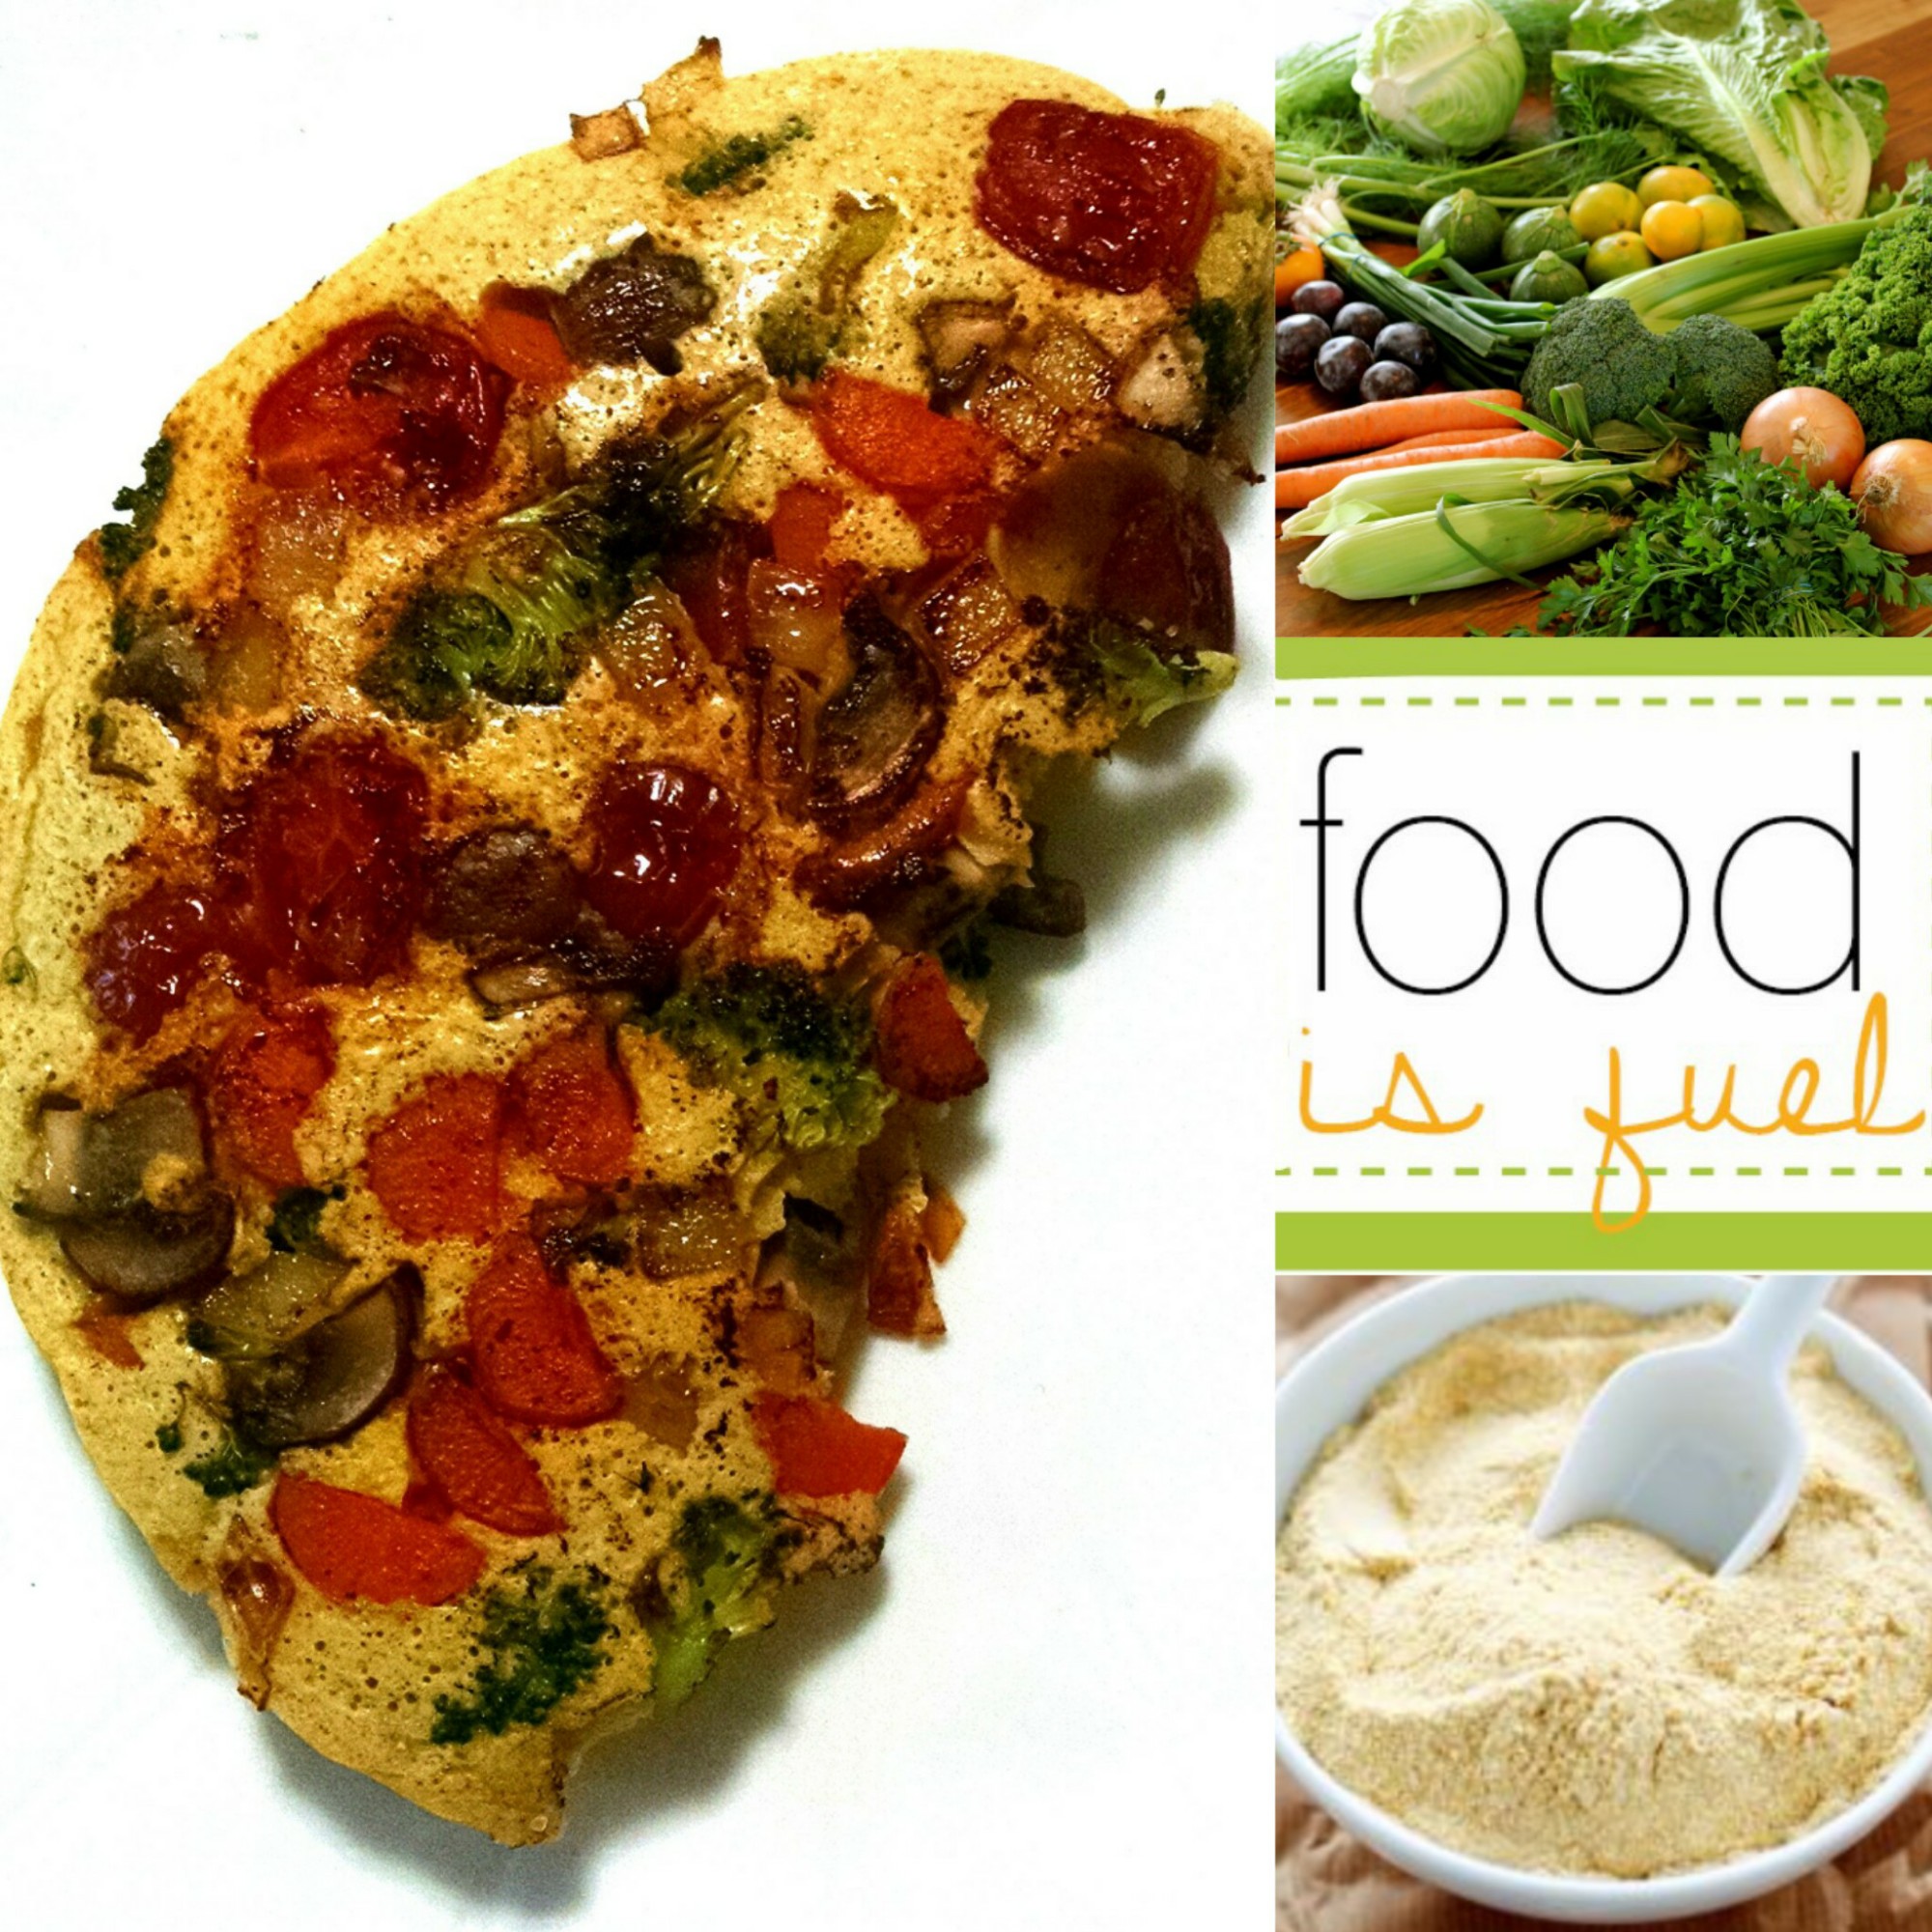
This beauty is packed full of veggies and fiber and protein(17g!!) that will keep you full and happy for hours!!
Now, don’t get me wrong..this, to me, in no way resembles or replaces eggs in flavor or texture but it is DELICIOUS nonetheless! It is almost like a veggie filled pancake. Whatever you decide to liken it to, you will love it.
Feel free to play around with the spices and flavors to suit your preferences, but below is the basic recipe:
INGREDIENTS:
•Veggies of choice (pictured I used carrot, onion, crimini, & broccoli)
•⅓ cup chickpea flour
•1 T nutritional yeast
•⅓ cup water
• salt and pepper
Sautee the veggies over medium heat in either coconut or olive oil until as soft or crunchy as you like.
Meanwhile, make the batter by whisking together the chickpeaflour, nutritional yeast, and salt & pepper. This is also where you would add any other spices you like. Cumin, basil, oregano, & chili powder, for example, would be super tasty!
Pour the batter over your veggies and DONT STIR OR MOVE IT. Let it cook for about 4-5 minutes then fold it over on itself and cook for another 1-3 minutes. Play with the doneness and cook time because I know some people like theirs a little undercooked whereas I like mine cooked through.
Top with delicious things like vegan sour cream and/or salsa 🙂
Eat. Enjoy. Love
Vegan Pizza Dough
Aside Posted on Updated on
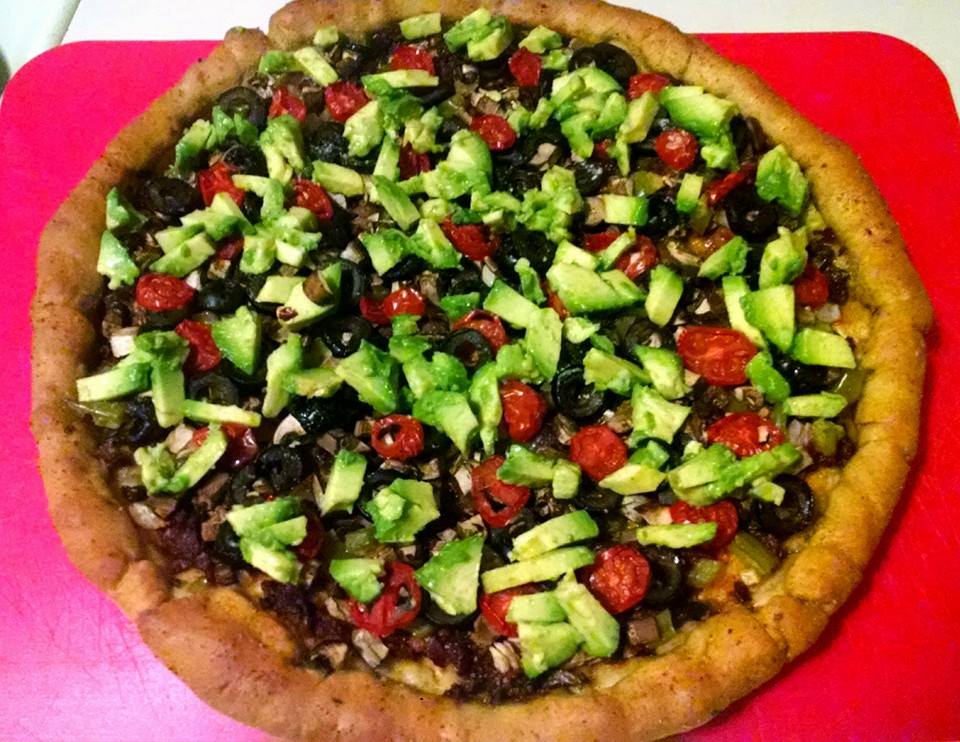 TOPPINGS IDEA #1:
Soyrizo, red onion, spinach, tomato, black olives, crimini mushrooms.
When almost finished baking brush crust with melted vegan butter & garlic powder.
After baking add avocado.
I LOVE pizza. Seriously. Daniel & I could eat it every single day of our lives!!!! Noted, we try really hard not to!!! But this crust makes it even harder because it is SO delicious. It gets wonderfully crisp on the outside, has such a good flavor and holds up very nicely to LOTS of toppings!!! (see above and below!)
Enough chit-chat. Just make this crust because I know you will LOVE it. Even if you aren’t vegan…you’ll STILL love it!!! Best crust I have EVER made at home, hands down, vegan or otherwise!!!
Makes one 12-16″ pizza (depending on how think you like your crust)
Ingredients:
- 1tsp sugar
- 1.5C warm water
- 1T active dry yeast
- 1T olive oil
- 1tsp salt
- 2C whole wheat flour
- 1.5C all-purpose flour (I always have bread flour on hand and use that)
- 1T melted vegan butter
- 1/2tsp garlic powder
Preparation:
In a large bowl, dissolve sugar in warm water. Sprinkle yeast over the top & let stand for about 10 minutes, until foamy.
Stir olive oil & salt into the yeast mixture, then mix in the whole wheat flour and 1 cup of the all-purpose flour until dough starts to come together. Tip dough out onto a surface floured with the remaining all-purpose flour & knead until all the flour has been absorbed & the ball of dough has become smooth (about 10 minutes). Place dough in a lightly-oiled(I use my Misto) bowl & lightly oil the top of the dough. Cover loosely with a towel & let stand in a warm place until doubled in size. Usually, this takes about 1 hour.
When the dough is doubled, tip dough out onto a lightly floured surface and form into a tight ball (could divide into 2 smaller balls for smaller pizzas). Let rise (either on surface or back in bowl) for about 45 minutes, or until doubled.
Preheat oven to 425°F. Roll dough with rolling pin until about 1/2-3/4 inch thick then drape over both of your fists & gently pull the edges outward while rotating the crust. When the circle has reached the desired size, place on a well oiled pizza pan. Add toppings.
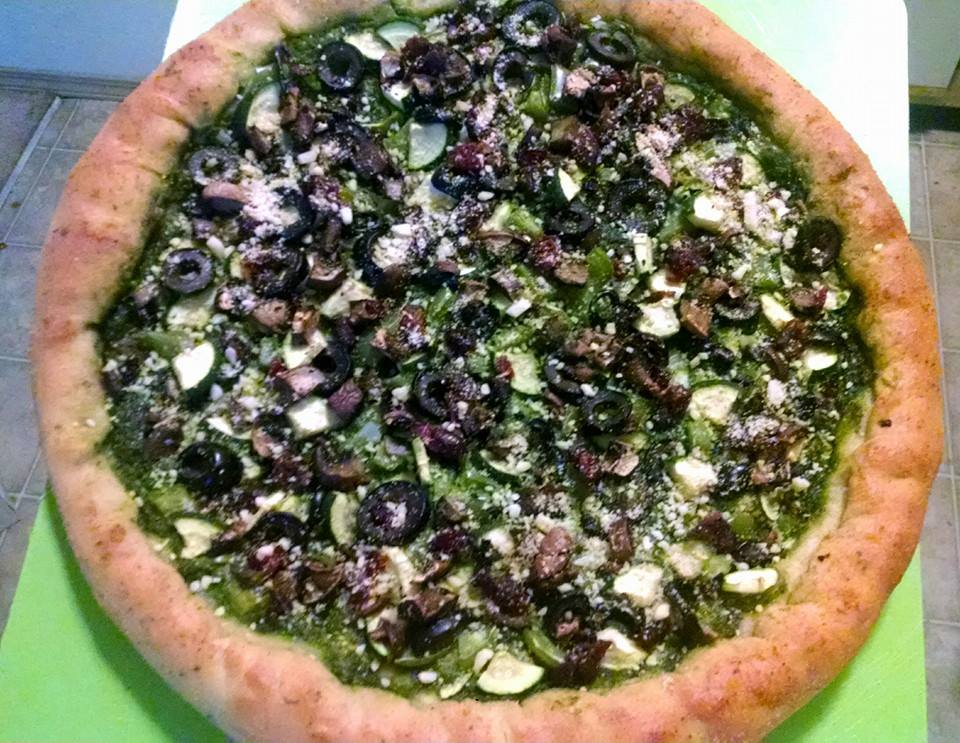 TOPPINGS IDEA #2:
Pesto (homemade or otherwise), crimini mushrooms, black olives, zucchini, red onion, green bell pepper, dried cranberries.
After baking top with Vegan Parm
Bake for 12 minutes then pull out and brush crust with vegan butter & sprinkle with garlic powder. This is why the crust is SO amazing!!!!
Bake for an additional 5-10 minutes (depending on thickness and crispiness desired) until the crust is crisp and golden to your liking.
Eat. Enjoy. Love.
Homemade Yumm Sauce

If you have ever eaten Cafe Yumm then you know what this is and it needs no explaining!!! For those of you who haven’t….well you’ve missed out BUT NOW you can make your own yumm bowls of all sorts at home!!! And you know that the sauce is homemade & healthier 🙂

- Yumm Bowl: a mixture of rice, beans, veggies, yumm sauce, salsa, & vegan sour cream(or non-vegan, if you please) then just mix up and enjoy!!)
<–This Yumm Bowl: brown jasmin rice, kidney beans, yumm sauce, spinach, cilantro, tomatoes, black olives, avocado, and salsa.
You can also use this as a yummy salad dressing, sandwich spread, pasta sauce, veggie/cracker dip, etc, etc, etc 🙂
So…to the recipe!!!
Makes 1-1.5 cups of sauce
Ingredients:
- 1/2 C light olive oil (you could sub canola, or another light-flavored oil)
- 1/2 C almonds
- 1/2 C cooked garbanzo beans (homemade or canned)
- Juice of 1/2 of a lemon
- 1tsp oregano
- 1/2 – 1tsp yellow curry powder (start with 1/2tsp and add more to your liking!)
- 1-2 cloves garlic (again, start with just 1 and add more to your liking!)
- 1T nutritional yeast
- a small handful of fresh cilantro (optional)
- 1/2 C unsweetened almond milk
- 1T packed raisins
Preparation:
Put everything into a high-powered blender (Nutribullet is my weapon of choice) and blend until creamy!! This sauce comes out pretty thick so if you want to use any or all of it as a salad dressing I would just add a bit more almond milk to make it a tad thinner. OR just have a nice thick salad dressing!!!
My super secret: The RAISINS!!!!! (Now your secret, too). When I was making this, something was missing then *poof* “RAISINS” popped into my head so I added them and VOILA!!!! Perfect deliciousness 🙂 🙂 🙂
Keep covered in the refrigerator. Should keep 1-2 weeks no problem…not that you won’t eat it all in a couple days 😉
Eat. Enjoy. Love
Vegan Cauliflower Sandwich Bread
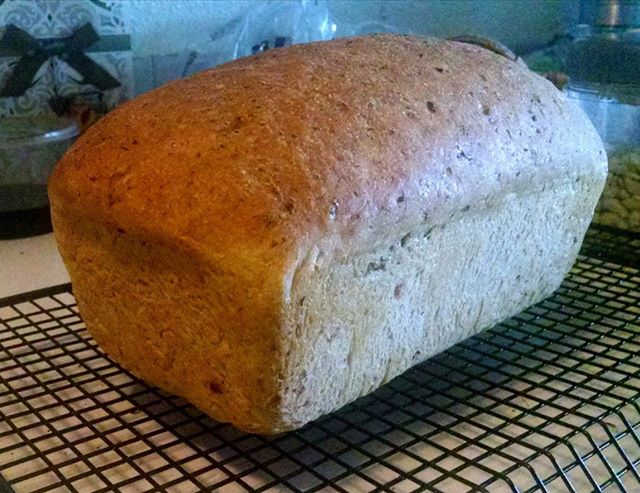
To be honest, I wasn’t sure how this was going to turn out! Haha. BUT, it is AMAZING!!!!!! It has a very light and slightly chewy texture with great flavor and it holds up perfectly for sandwiches and is WONDERFUL for toast!!!
I am going to be making a loaf of this every weekend from here on out!! And considering it is vegan, extremely healthy with NO artificial ingredients or any preservatives AND the cost to make it is about $1.00 it would be silly of me NOT to make it 🙂 I will also try adding in some dried fruit and nuts into one of my loaves next time…stay tuned for how that turns out!!
Makes 1 standard loaf.
Ingredients:
- 1C Water
- 1T active yeast
- 1T raw sugar or maple syrup
- 2C unbleached white flour or bread flour
- 1C whole wheat flour
- 1C cauliflower rice/grated/pulsed
- 1 1/4 tsp salt
- 1/4 tsp cumin powder (optional)
- 1/4 tsp Italian herb blend (optional)
- 1T extra virgin olive oil (optional)
Preparation:
Activate the yeast in 1/4 cup warm water, with sugar/syrup. Mix and let sit for 5 minutes or until frothy.
Grate, pulse or “rice” the cauliflower and measure 1 packed cup. I put 1.5 loaded cups small florets in my food processor and it gave me a cup of cauliflower “rice”.
In a bowl, mix all the flours, salt, spices, grated cauliflower.
Add the yeast mixture, oil and a 3/4 cup water and knead into a dough. Add more water if needed. Knead for 6-8 minutes. Spray/brush oil on top, cover with a towel and let the dough rise until doubled (1.5-2 hours).
Punch the dough down, use a tablespoon or so flour and shape into a “loaf”. Place seam side down in a bread pan.
Spray/brush oil on top. If desired, sprinkle with sesame seeds, oats, or flaxmeal. Cover with a towel and let rise for 45 minutes, or until close to doubled. The rise time varies based on the environment, so as soon as the the bread has risen more than 1.5 time its original size, start pre-heating the oven.
Bake at 375° oven for 35-40 minutes. After about 3/4 of the baking time, brush the top of the loaf with oil or vegan butter – it helps keep the crust soft 🙂
Take bread out and remove from pan. Let cool completely before slicing. I keep my loaf unsliced and slice it “to order”. I also keep mine in the refrigerator to ensure it stays fresh all week!
Eat. Enjoy. Love.
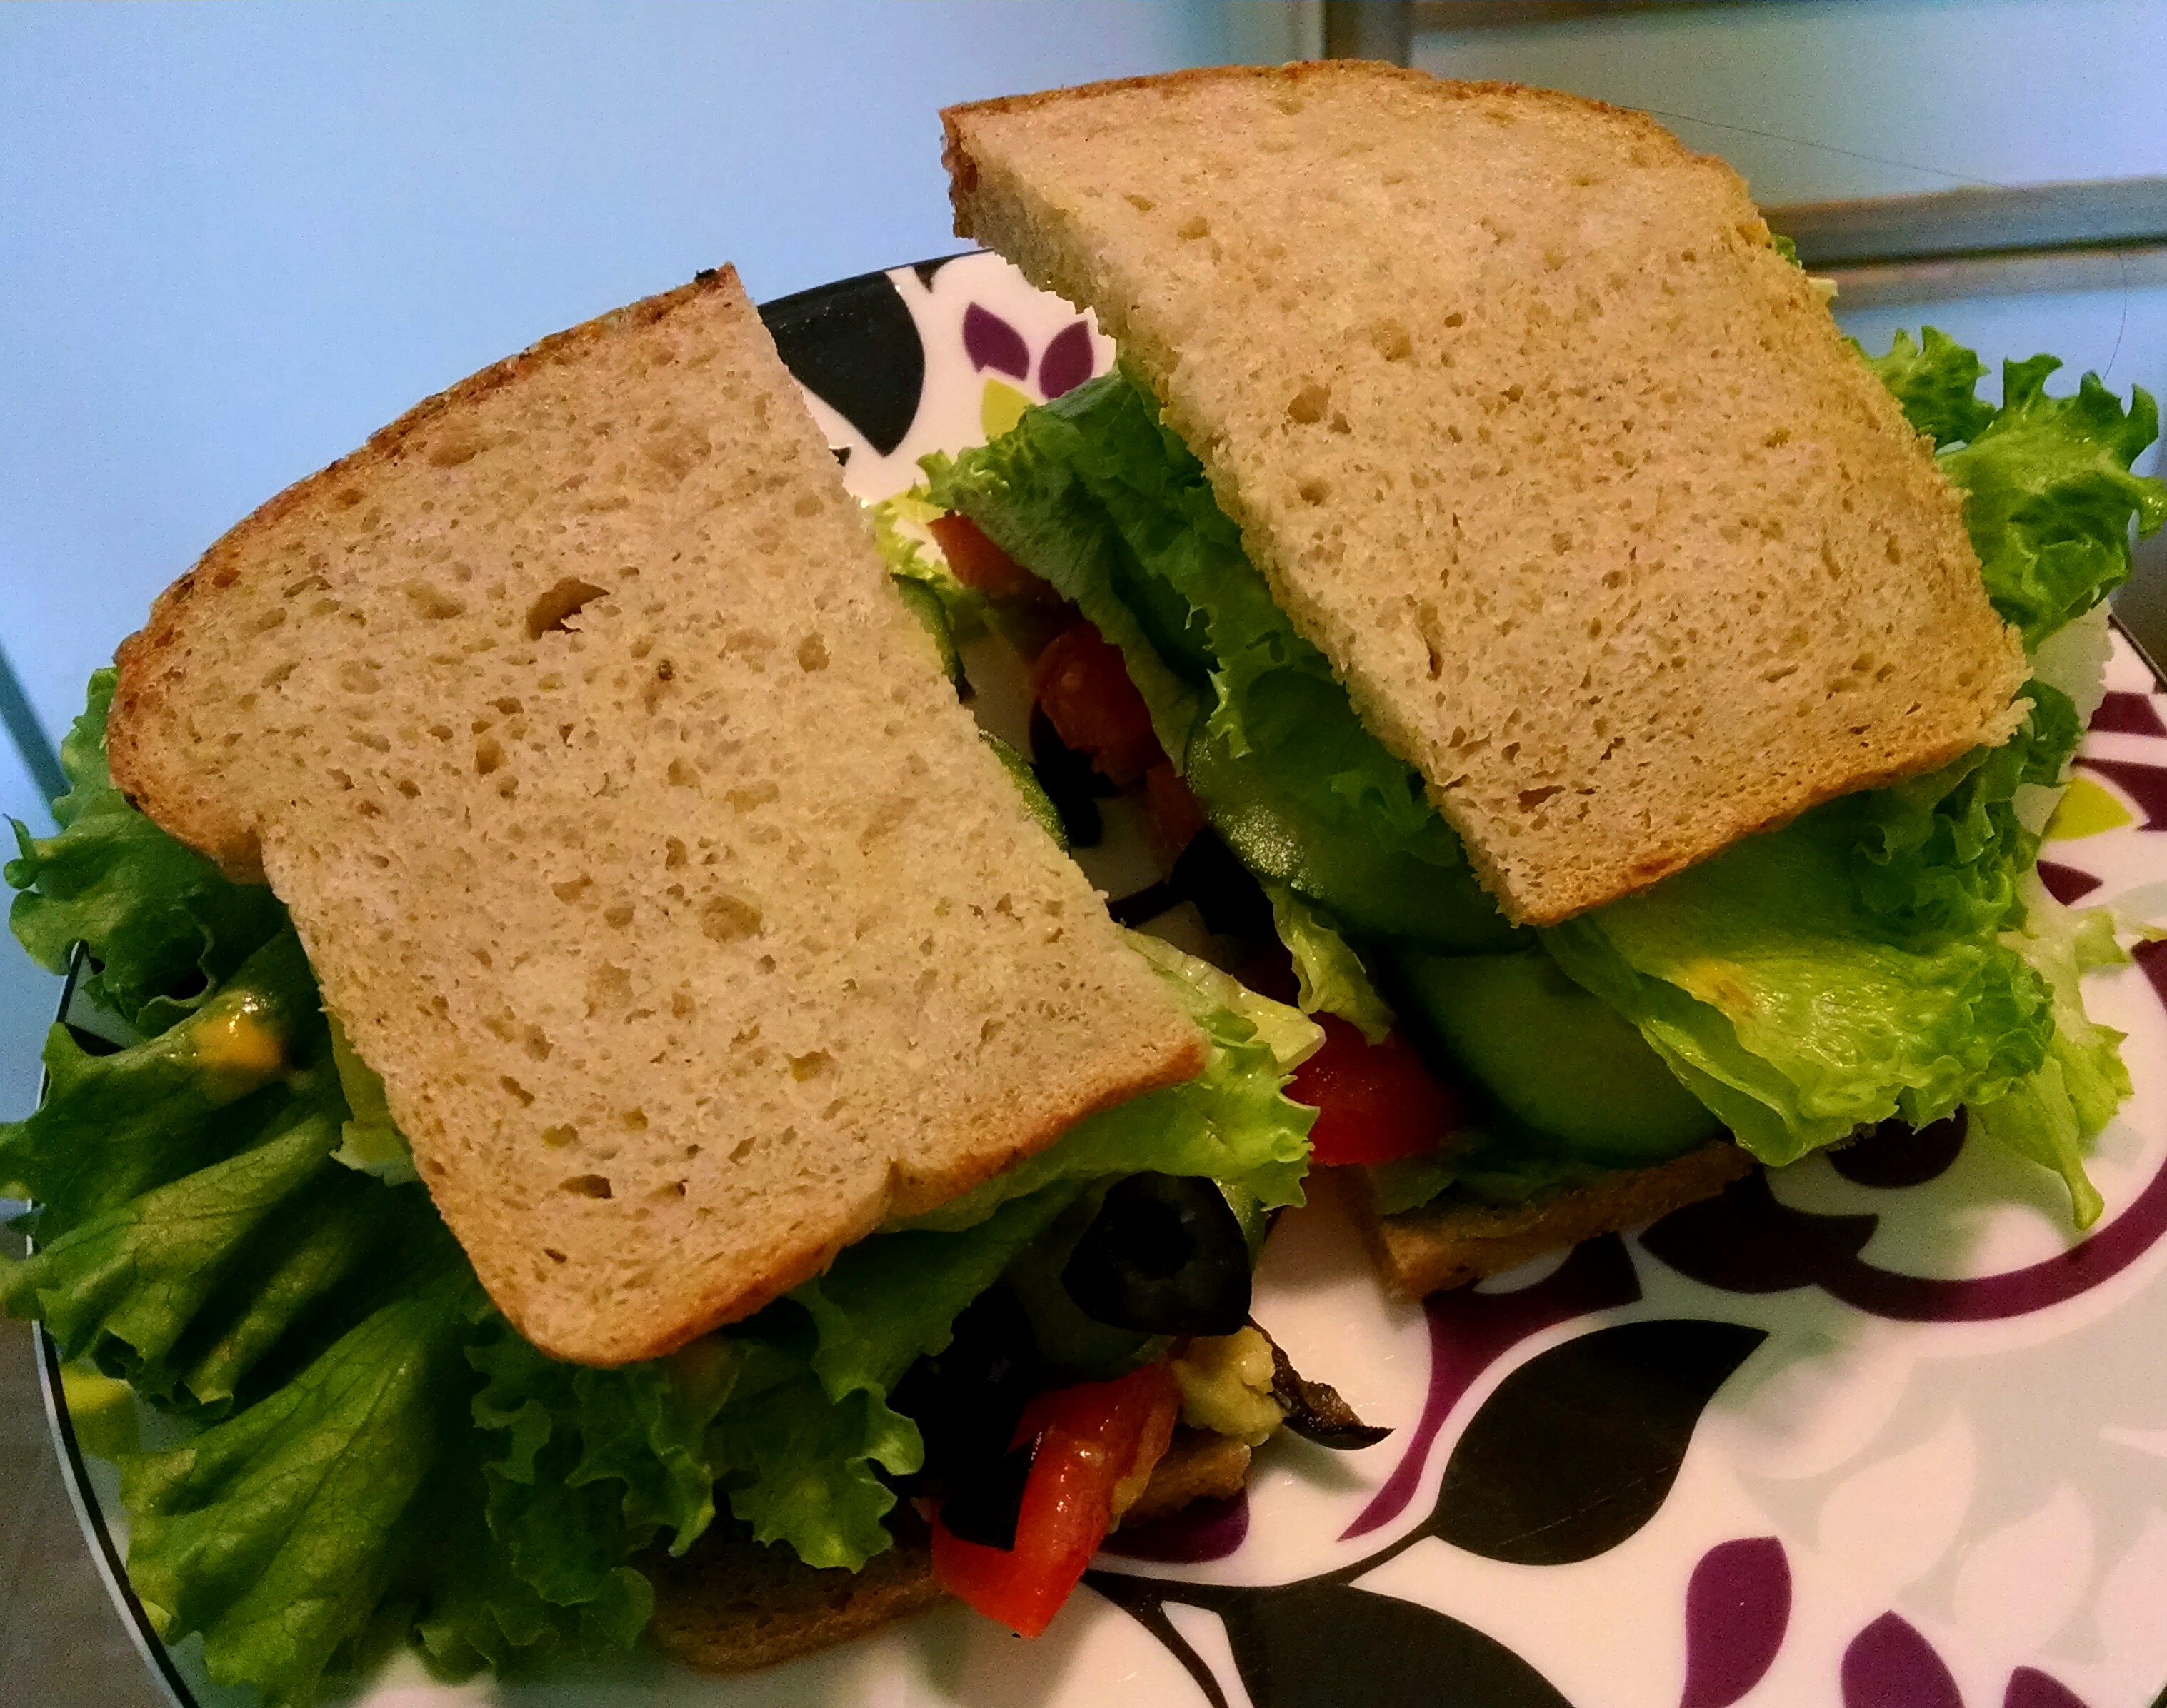 Veggie Sandwich….YUM!!!!!
Vegan “Queso” Dip

Ok….This stuff is PHENOMENAL!!!!! I love recipes like this because it makes it so simple to not miss the “real” thing. This dip is creamy, velvety, cheesy and you’d never guess that the main ingredient is eggplant. Yup. EGGPLANT! This also means that there are only about 55 calories per serving. Now that is a dip I’ll really enjoy eating!!! It also reheats really well so you can keep the leftovers in the fridge for several days 🙂
Makes roughly 6 servings.
Ingredients:
- 7-9 rounds of eggplant, sliced 1/4-inch thick
- Olive oil
- Sea salt
- 1 1/2 cups unsweetened almond milk
- 2-3 Tbsp nutritional yeast
- 1 tsp finely minced fresh garlic
- 1 tsp cumin
- 1 tsp chili powder
- 1/4-1/2 tsp cayenne pepper (optional)
- 3 tsp cornstarch (sub another thickener if desired)
- 1/4-1/2 cup chunky medium salsa, slightly drained
- Slice your eggplant into thin rounds just under 1/2 inch (not quite 1/4 inch), then sprinkle both sides of the flesh with a little sea salt and arrange in a colander to help draw out some of the moisture and bitterness. Let set for 10-15 minutes, then rinse with cool water and thoroughly pat dry between two clean towels.
- Preheat oven to high broil and place an oven rack near the top of the oven. Arrange the dried eggplant rounds on a baking sheet lightly spritzed with non-stick spray and drizzle both sides of the eggplant with a little olive oil. Sprinkle with a very small amount of salt.
- Broil on high for 4-5 minutes on each side, watching carefully as to not let them burn. Flip at the halfway point to ensure even cooking. Once the eggplant appears tender and both sides have golden brown color, remove from the oven and wrap loosely in foil to steam.
- After a few minutes, unwrap and peel the eggplant skin away. It should come right off. If you pack your roasted eggplant into a 1-cup measuring cup, it should be almost 1 cup.
- Place eggplant in a blender with the 1.5 cups almond milk, 2 Tbsp nutritional yeast, minced garlic, cumin, chili powder and cornstarch and blend on high until smooth and creamy. Taste and adjust seasonings as needed. I added a pinch more sea salt and a little more nutritional yeast. To thin, add more almond milk.
- Transfer to a small saucepan and warm over medium to medium heat until slightly thickened and bubbly – about 5 minutes. The longer you go the thicker it will become.
- NOTE: If it isn’t looking as thick as you want, thicken with a slurry of cornstarch by adding an additional 1 tsp cornstarch to a small bowl with a little almond milk. Whisk to combine and then stir back into the pot. This should thicken it right up.
- Once hot and thickened, remove from heat and stir in salsa. remember to slightly drain your salsa so it doesn’t make the dip too runny. I added extra salsa on top of mine once it was in the serving dish 🙂
- Serve with chips, crackers or veggies. Or use it for in burritos, quesadillas, tacos, or on top of a veggie&rice bowl, or on pasta…the options are ENDLESS!!!
Eat. Enjoy. Love
Vegan Loaded Muffins

I absolutely love 1 or 2 of these for a quick breakfast or snack 🙂 They are great warmed up with a little butter (I use vegan Earth Balance). YUM!!! They are FULL of yummy ingredients (from veggies to fresh fruit to dried fruit to nuts) and you can be completely creative with what nuts and dried fruits you use. Just use what you have in your pantry and they will be delicious. The options are endless 🙂
Makes about 16 muffins
Ingredients:
- 3T flaxseed meal
- 6.5T water
- 1/3 C applesauce
- 1T vegetable oil
- 1/4C almond milk
- 1T vanilla extract
- 1 zucchini, grated
- 1/3 C brown sugar
- 1 1/2 C flour (I always use whole wheat pastry flour)
- 1/2 C coconut flour
- 1T cinnamon
- 2 tsp baking powder
- 1/2 tsp baking soda
- 1/2 tsp salt
- 2 small carrots, grated
- 1 apple, 1/2 grated, half chopped into raisin-sized pieces)
- 1/3 C dried fruit ( I used a combo of golden raisins, cranberries, and chopped up apricots)
- 2T chopped walnuts
Preparation:
Preheat oven to 375° and line muffin tins with paper liners (though I HIGHLY suggest investing in a silicone muffin tray…it will change your world!!)
In a medium bowl, whisk flax meal, water, applesauce, zucchini, oil, brown sugar, & vanilla.
In a large bowl, stir together flours, cinnamon, baking powder, baking soda, and salt. Stir the carrots, apple, dried fruit, and nuts into the flour mixture to coat.
Add the wet ingredients to the dry and stir to combine. If too dry, add a little almond milk.
Spoon into the muffin tins, filling totally full for full-sized muffins (or 3/4 if you prefer smaller muffins…this is what is pictured and it makes about 20 muffins).
Bake for 25-35 minutes, or until golden and a knife comes out 90-100% clean. **I like to take them out at the 90% mark because I like them to stay really moist inside**
Eat. Enjoy. Love.
Nutrition, per serving, when 16 full-sized muffins are made:

