Quick & Easy
Yellow Split Pea Soup (vegan)
- It’s Fall and that means I feel like making soup every week!!! So…I might just do that 🙂
- Behold…week 1 of soup season:
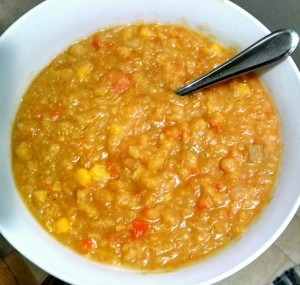

I have posted a split pea soup recipe before but it used bacon and butter so I wanted to tweak it to be even more delicious while following a plant-based approach. The result is DELICIOUS!! I use my immersion blender to help give the soup a “creamy” texture and the flavors are so simple but so, so tasty…especially with a big chunk of crusty bread to dip into it!
- One day I even ate some leftovers with some steamed broccoli tossed in! Another day, I tossed in spinach! You can be creative with a soup this simple ❤
- Did I mention it is SUPER EASY to make? Well, it is! Simple, delicious, versatile, AND healthy…come on. Make this ASAP!!
- **I love the color of yellow split peas. But you can totally use green if you prefer**
- INGREDIENTS:
- •1lb of yellow split peas
- •4-5 carrots
- •2-3 stalks celery
- •1 onion
- •2Tbs garlic, minced
- •1Tbs olive oil
- •½ bag of frozen corn (NOT canned!)
- •6 cups water or veggie broth
- •Vegetable bouillon (if using water)
- •Seasonings to your liking (I just used salt & pepper)
DIRECTIONS:
Rinse your split peas thoroughly and set aside for now.
- Slice up onion, carrot, and celery and saute in olive oil until beginning to soften. +/-5-7 minutes usually does the trick. Set pan aside
- In a large stock pot, add water or broth, split peas, seasonings, bouillons (if using water), and garlic.
- Bring to a boil, reduce heat and cook on medium for 30 minutes or until peas are soft and start to fall apart.
- Add in all the veggies including the corn and cook for another 5-10 minutes.
- I use my immersion blender to blend the soup about 50%. I like some chunks left but like the texture of the soup better slightly blended…makes it feel “creamier”. You can also blend the soup in batches in a standard blender. (Be sure you dont fill it too much, and just loosely hold the lid on with a towel over it to avoid a messy disaster!) BUT, you can also simply skip the blending step if you like.
- **You may need to add some additional water if you like yours “soupier”**
- Stores in the fridge for a good solid week. And freeze great too so I like to double the recipe and freeze half!!
- Eat. Enjoy. Love.
Chickpea Flour “Omelet”
I love savory things for breakfast. Sometimes I really miss a big pile of scrambled eggs and veggies…so what do I do? Toast with avocado is great. Oatmeal and smooties are good, also. But what if I want something…more special?
Enter: The chickpea (garbanzo bean) flour “omelet”
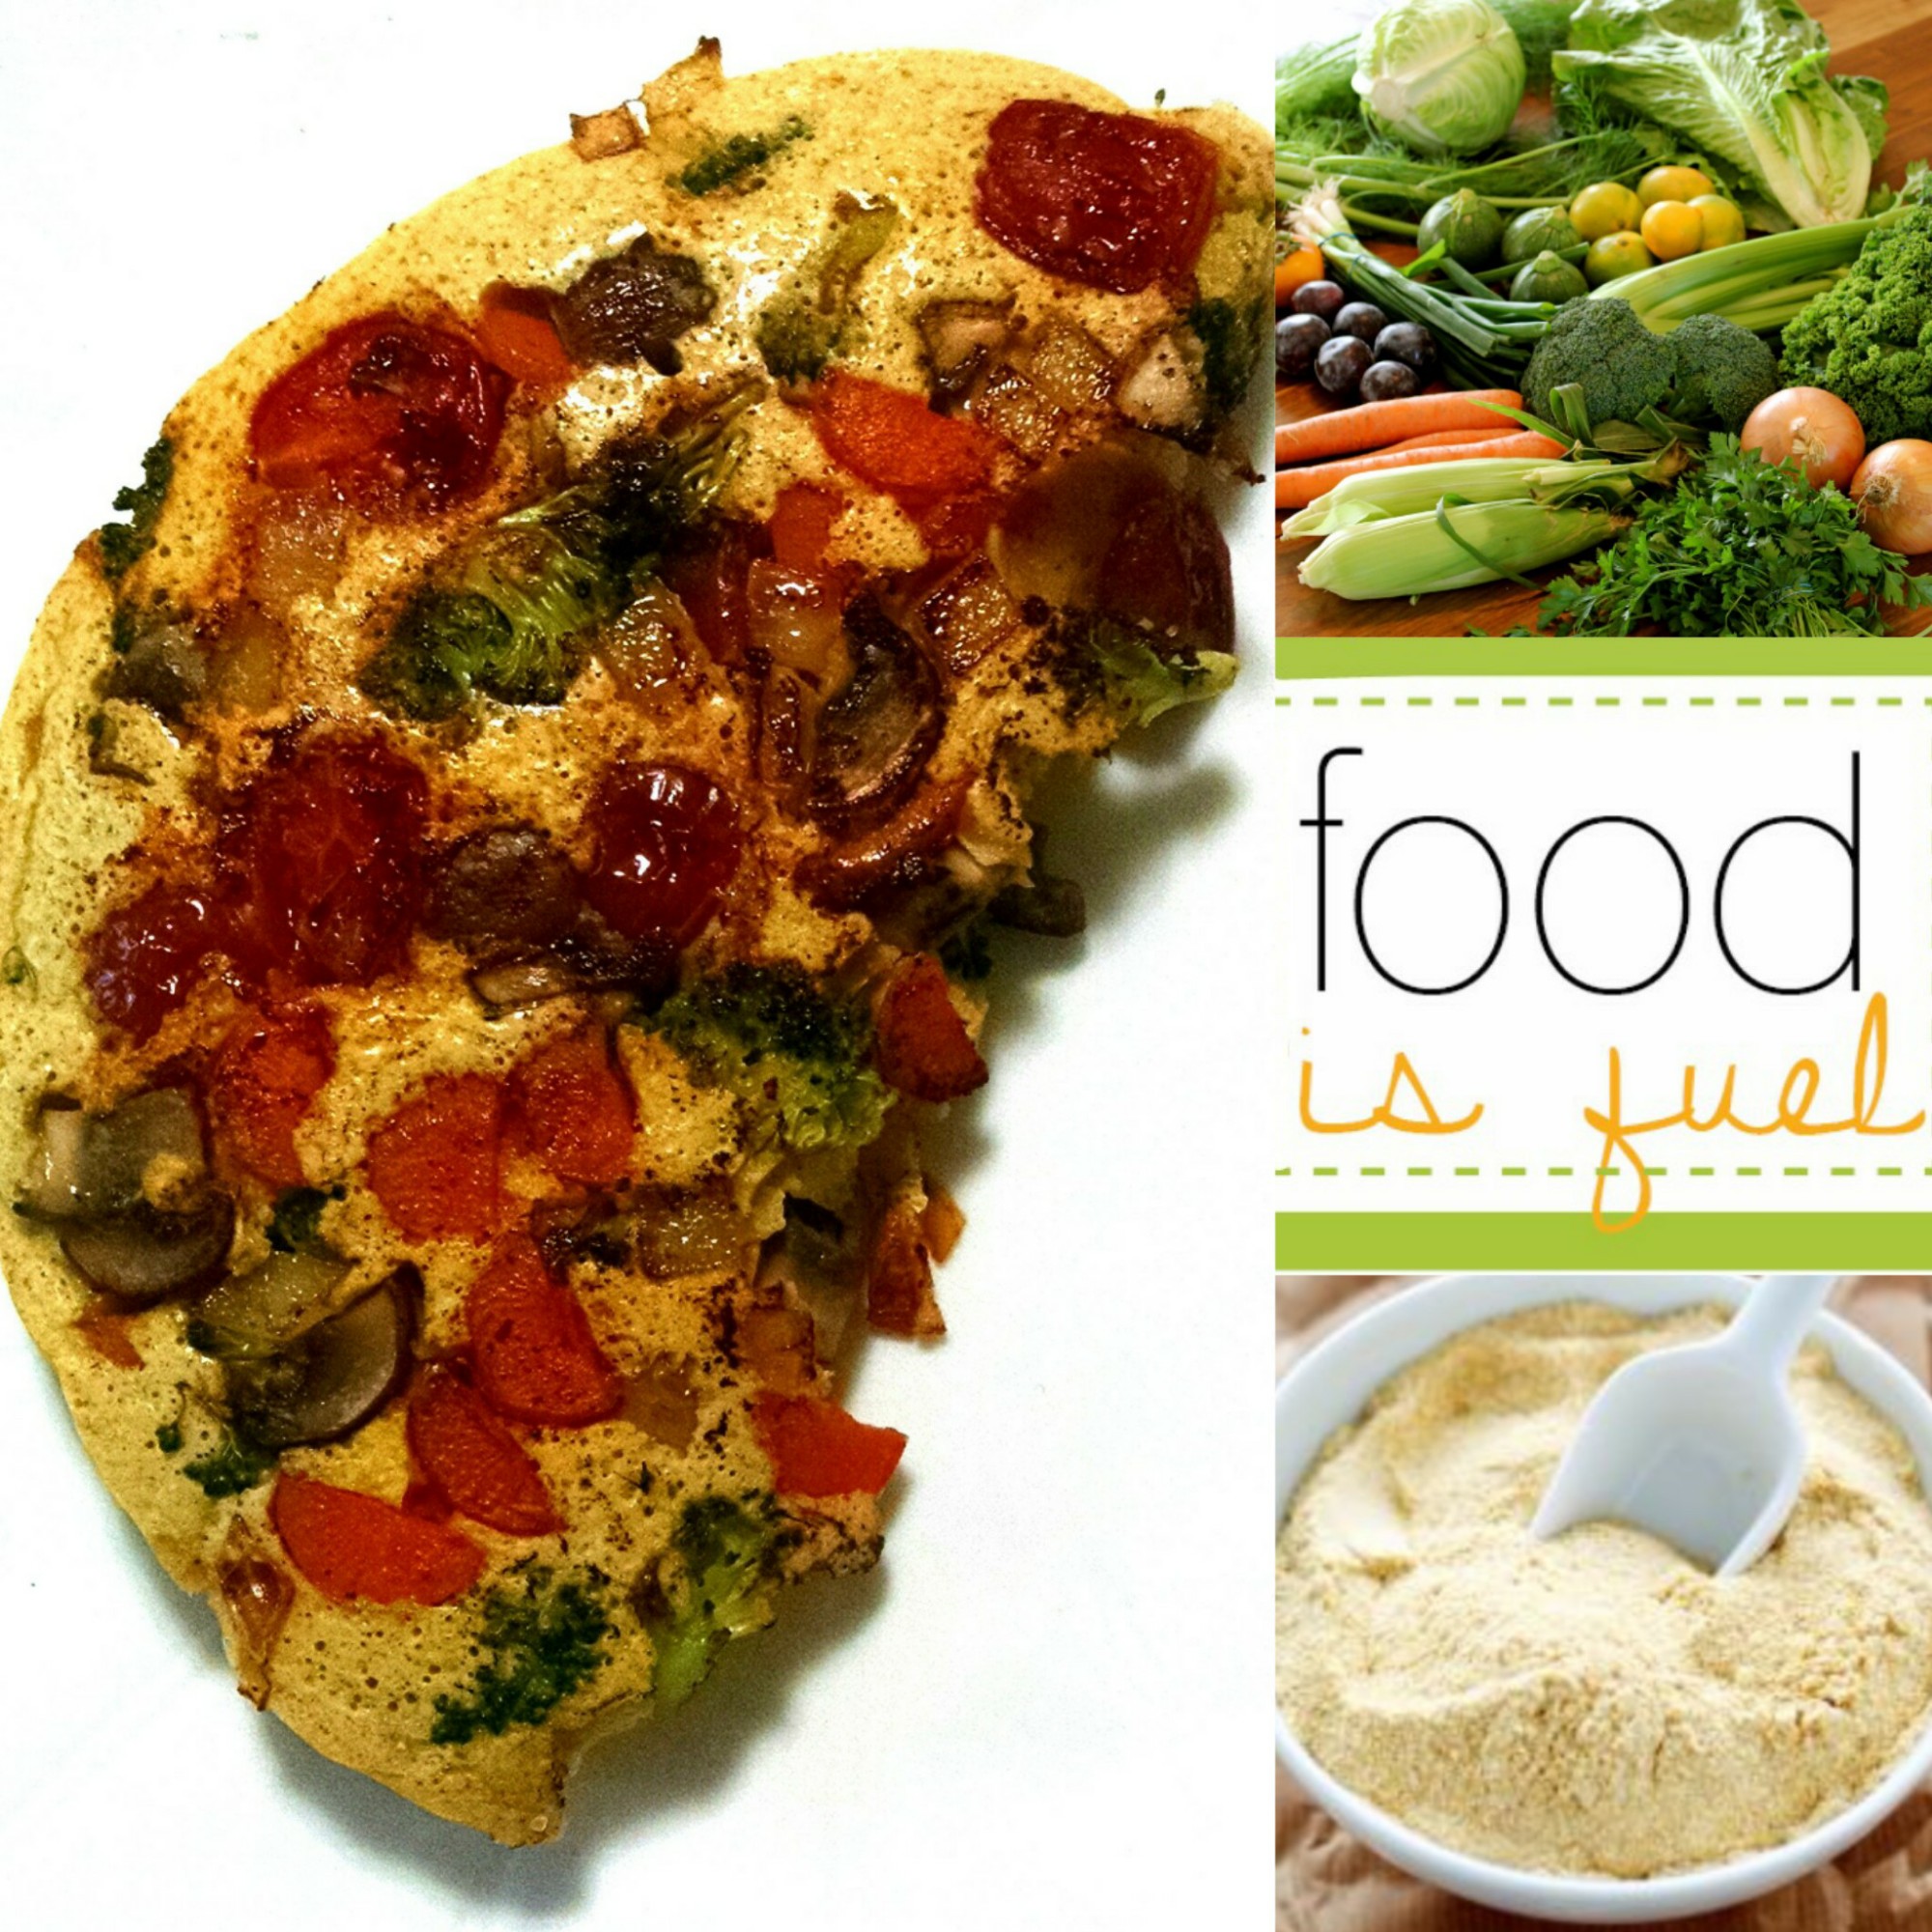
This beauty is packed full of veggies and fiber and protein(17g!!) that will keep you full and happy for hours!!
Now, don’t get me wrong..this, to me, in no way resembles or replaces eggs in flavor or texture but it is DELICIOUS nonetheless! It is almost like a veggie filled pancake. Whatever you decide to liken it to, you will love it.
Feel free to play around with the spices and flavors to suit your preferences, but below is the basic recipe:
INGREDIENTS:
•Veggies of choice (pictured I used carrot, onion, crimini, & broccoli)
•⅓ cup chickpea flour
•1 T nutritional yeast
•⅓ cup water
• salt and pepper
Sautee the veggies over medium heat in either coconut or olive oil until as soft or crunchy as you like.
Meanwhile, make the batter by whisking together the chickpeaflour, nutritional yeast, and salt & pepper. This is also where you would add any other spices you like. Cumin, basil, oregano, & chili powder, for example, would be super tasty!
Pour the batter over your veggies and DONT STIR OR MOVE IT. Let it cook for about 4-5 minutes then fold it over on itself and cook for another 1-3 minutes. Play with the doneness and cook time because I know some people like theirs a little undercooked whereas I like mine cooked through.
Top with delicious things like vegan sour cream and/or salsa 🙂
Eat. Enjoy. Love
Homemade Yumm Sauce

If you have ever eaten Cafe Yumm then you know what this is and it needs no explaining!!! For those of you who haven’t….well you’ve missed out BUT NOW you can make your own yumm bowls of all sorts at home!!! And you know that the sauce is homemade & healthier 🙂

- Yumm Bowl: a mixture of rice, beans, veggies, yumm sauce, salsa, & vegan sour cream(or non-vegan, if you please) then just mix up and enjoy!!)
<–This Yumm Bowl: brown jasmin rice, kidney beans, yumm sauce, spinach, cilantro, tomatoes, black olives, avocado, and salsa.
You can also use this as a yummy salad dressing, sandwich spread, pasta sauce, veggie/cracker dip, etc, etc, etc 🙂
So…to the recipe!!!
Makes 1-1.5 cups of sauce
Ingredients:
- 1/2 C light olive oil (you could sub canola, or another light-flavored oil)
- 1/2 C almonds
- 1/2 C cooked garbanzo beans (homemade or canned)
- Juice of 1/2 of a lemon
- 1tsp oregano
- 1/2 – 1tsp yellow curry powder (start with 1/2tsp and add more to your liking!)
- 1-2 cloves garlic (again, start with just 1 and add more to your liking!)
- 1T nutritional yeast
- a small handful of fresh cilantro (optional)
- 1/2 C unsweetened almond milk
- 1T packed raisins
Preparation:
Put everything into a high-powered blender (Nutribullet is my weapon of choice) and blend until creamy!! This sauce comes out pretty thick so if you want to use any or all of it as a salad dressing I would just add a bit more almond milk to make it a tad thinner. OR just have a nice thick salad dressing!!!
My super secret: The RAISINS!!!!! (Now your secret, too). When I was making this, something was missing then *poof* “RAISINS” popped into my head so I added them and VOILA!!!! Perfect deliciousness 🙂 🙂 🙂
Keep covered in the refrigerator. Should keep 1-2 weeks no problem…not that you won’t eat it all in a couple days 😉
Eat. Enjoy. Love
Vegan “Queso” Dip

Ok….This stuff is PHENOMENAL!!!!! I love recipes like this because it makes it so simple to not miss the “real” thing. This dip is creamy, velvety, cheesy and you’d never guess that the main ingredient is eggplant. Yup. EGGPLANT! This also means that there are only about 55 calories per serving. Now that is a dip I’ll really enjoy eating!!! It also reheats really well so you can keep the leftovers in the fridge for several days 🙂
Makes roughly 6 servings.
Ingredients:
- 7-9 rounds of eggplant, sliced 1/4-inch thick
- Olive oil
- Sea salt
- 1 1/2 cups unsweetened almond milk
- 2-3 Tbsp nutritional yeast
- 1 tsp finely minced fresh garlic
- 1 tsp cumin
- 1 tsp chili powder
- 1/4-1/2 tsp cayenne pepper (optional)
- 3 tsp cornstarch (sub another thickener if desired)
- 1/4-1/2 cup chunky medium salsa, slightly drained
- Slice your eggplant into thin rounds just under 1/2 inch (not quite 1/4 inch), then sprinkle both sides of the flesh with a little sea salt and arrange in a colander to help draw out some of the moisture and bitterness. Let set for 10-15 minutes, then rinse with cool water and thoroughly pat dry between two clean towels.
- Preheat oven to high broil and place an oven rack near the top of the oven. Arrange the dried eggplant rounds on a baking sheet lightly spritzed with non-stick spray and drizzle both sides of the eggplant with a little olive oil. Sprinkle with a very small amount of salt.
- Broil on high for 4-5 minutes on each side, watching carefully as to not let them burn. Flip at the halfway point to ensure even cooking. Once the eggplant appears tender and both sides have golden brown color, remove from the oven and wrap loosely in foil to steam.
- After a few minutes, unwrap and peel the eggplant skin away. It should come right off. If you pack your roasted eggplant into a 1-cup measuring cup, it should be almost 1 cup.
- Place eggplant in a blender with the 1.5 cups almond milk, 2 Tbsp nutritional yeast, minced garlic, cumin, chili powder and cornstarch and blend on high until smooth and creamy. Taste and adjust seasonings as needed. I added a pinch more sea salt and a little more nutritional yeast. To thin, add more almond milk.
- Transfer to a small saucepan and warm over medium to medium heat until slightly thickened and bubbly – about 5 minutes. The longer you go the thicker it will become.
- NOTE: If it isn’t looking as thick as you want, thicken with a slurry of cornstarch by adding an additional 1 tsp cornstarch to a small bowl with a little almond milk. Whisk to combine and then stir back into the pot. This should thicken it right up.
- Once hot and thickened, remove from heat and stir in salsa. remember to slightly drain your salsa so it doesn’t make the dip too runny. I added extra salsa on top of mine once it was in the serving dish 🙂
- Serve with chips, crackers or veggies. Or use it for in burritos, quesadillas, tacos, or on top of a veggie&rice bowl, or on pasta…the options are ENDLESS!!!
Eat. Enjoy. Love
Vegan Cashew Alfredo Sauce
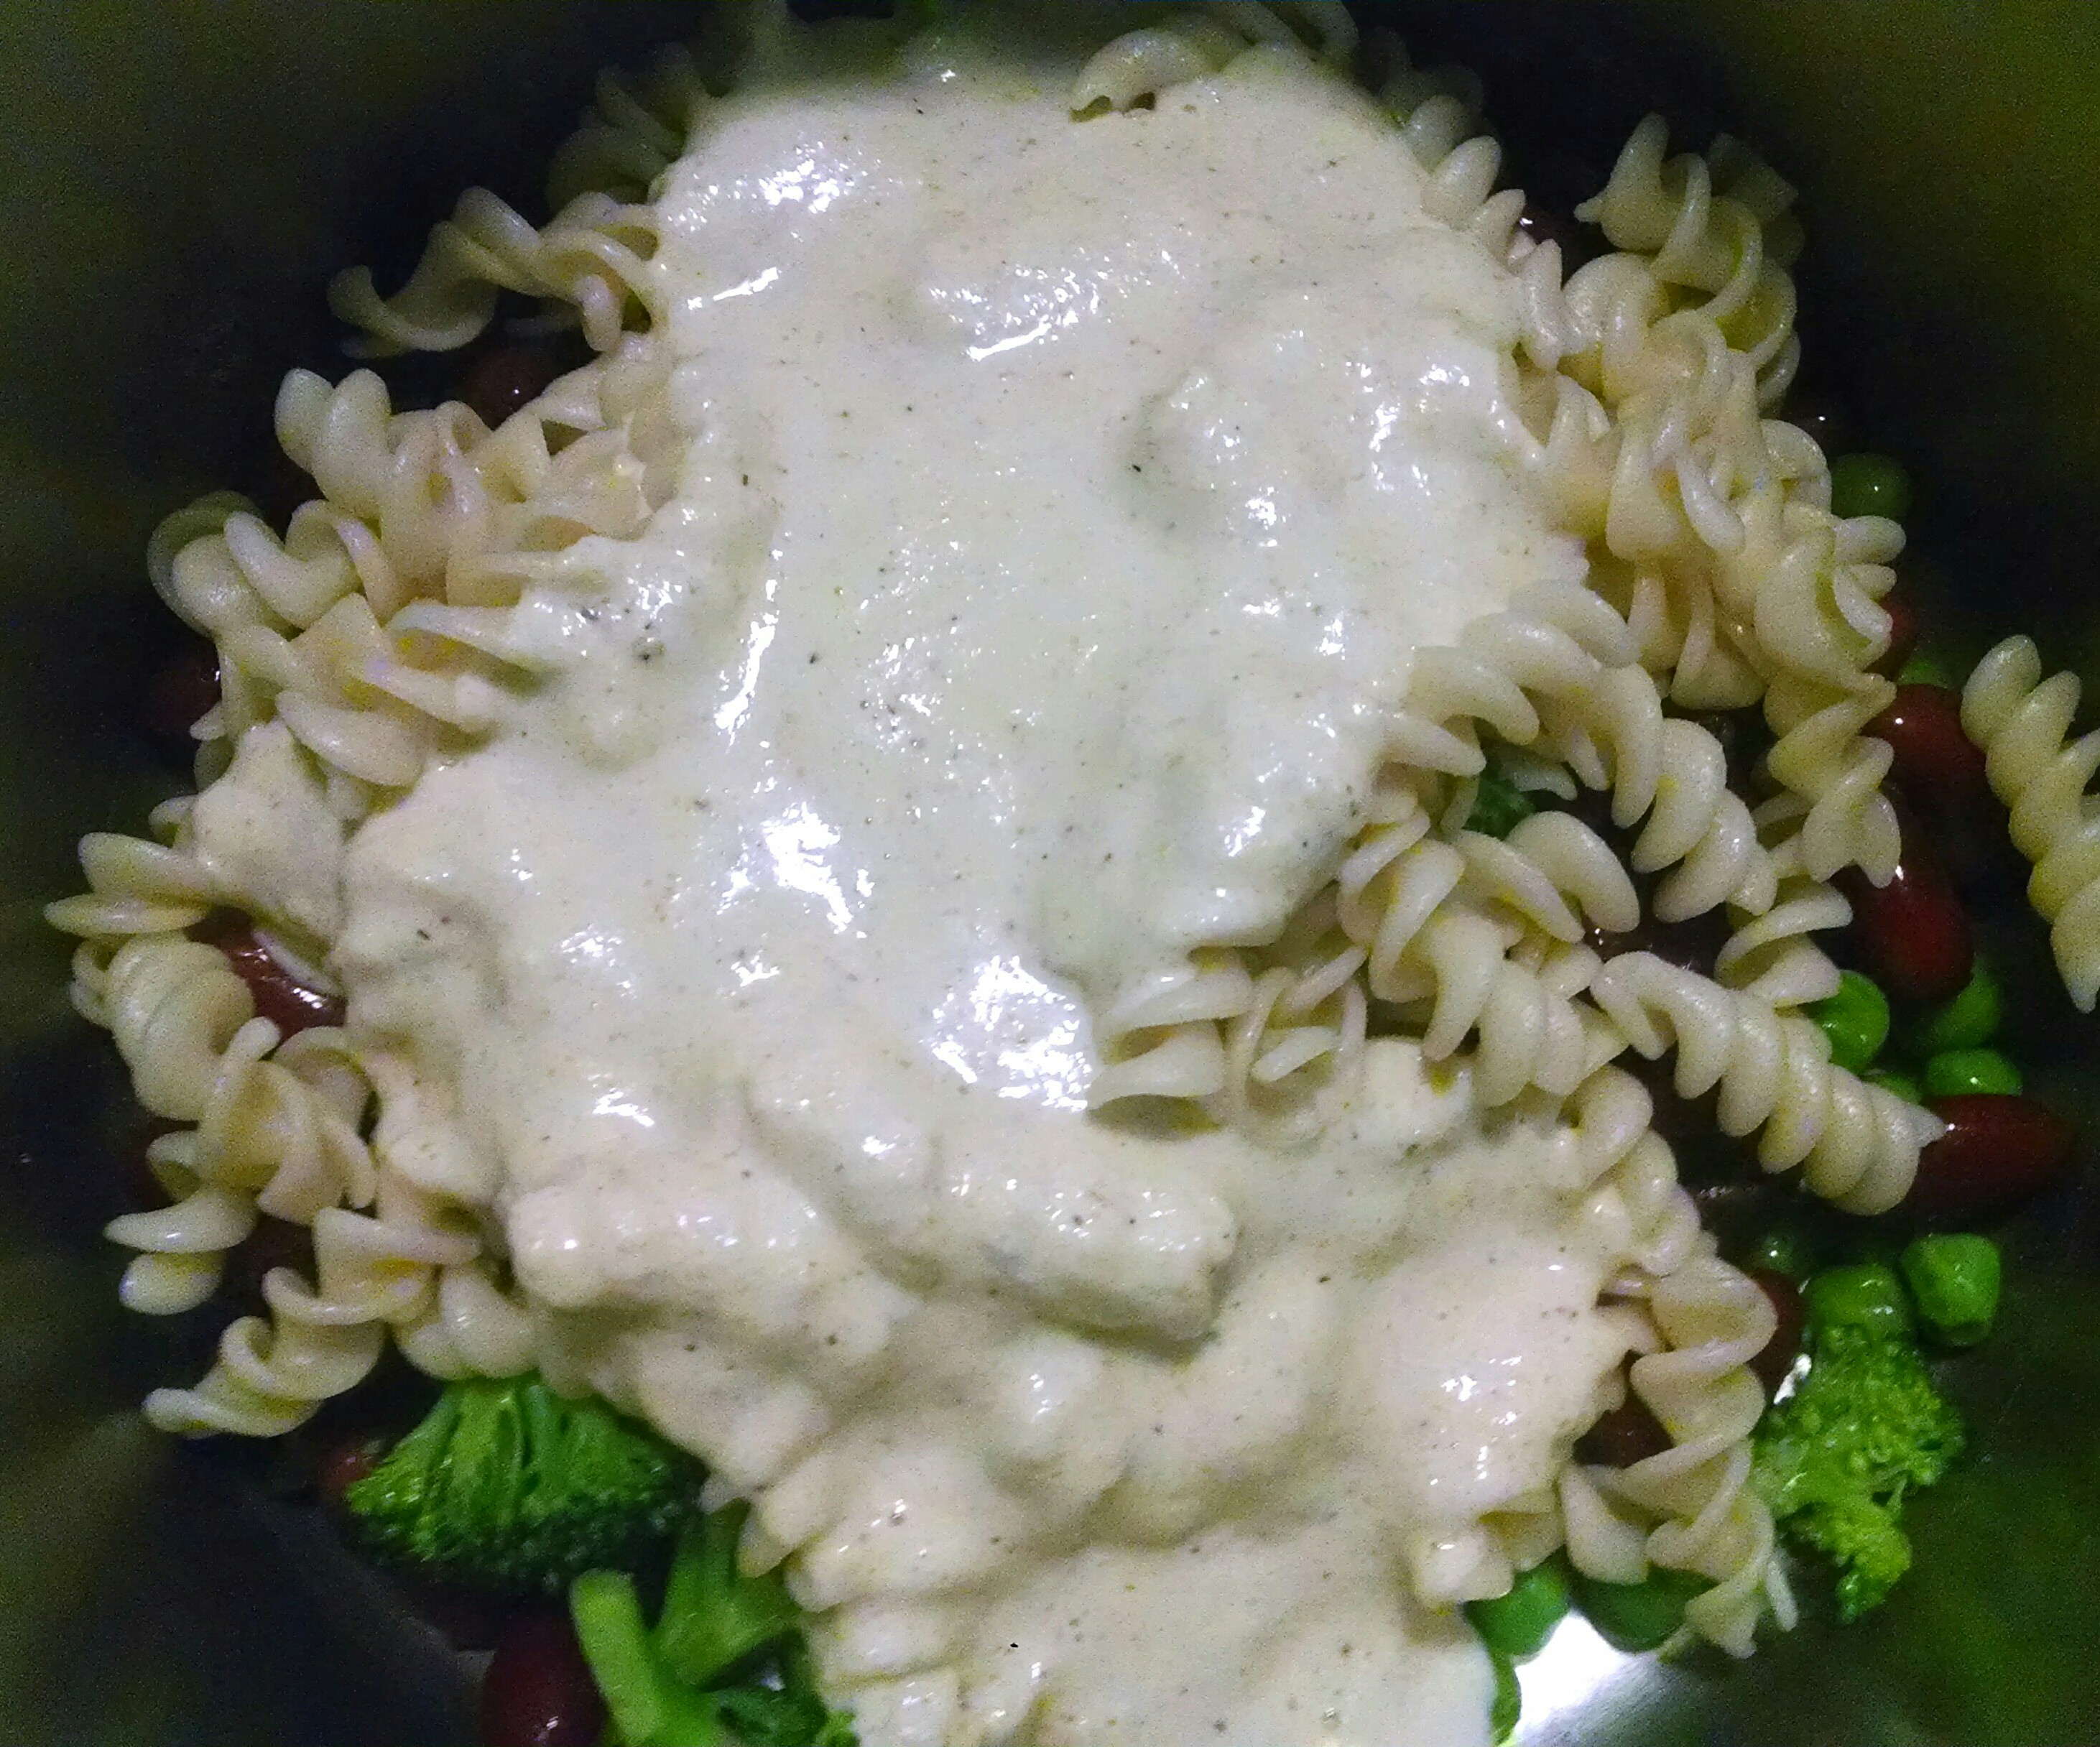
This sauce is so easy, creamy, flavorful, and just plain delicious!! I enjoyed it with some delicious pasta (ingredients to come at the end of post) but this would be amazing on broccoli or cauliflower, as a dip, and, and, and. It is just simple & amazing.
Ingredients:
**Makes 3-4 servings, depending on how much you use**
- 3/4 cup raw cashews
- 1 1/4 cup hot water (if you are having this with pasta, use the starchy water from cooking the pasta!)
- 1-3 garlic cloves, based of flavor preference
- Juice of 1/2 lemon
- 1T extra virgin olive oil
- 2-3T nutritional yeast
- Salt & pepper to taste
- 1T psyllium husk, optional
Put all ingredients, except for psyllium husk and S&P, in a high-powered blender (you all know I LOVE my Nutribullet) and blend until smooth and creamy. Season with salt and pepper to taste. If you want a thicker consistency add 1T of psyllium husk and blend again for a few seconds. It will thicken within a minute…and adds some extra fiber 🙂
That’s it. Told you it was simple 🙂
Put it on any and everything!!! Such as….
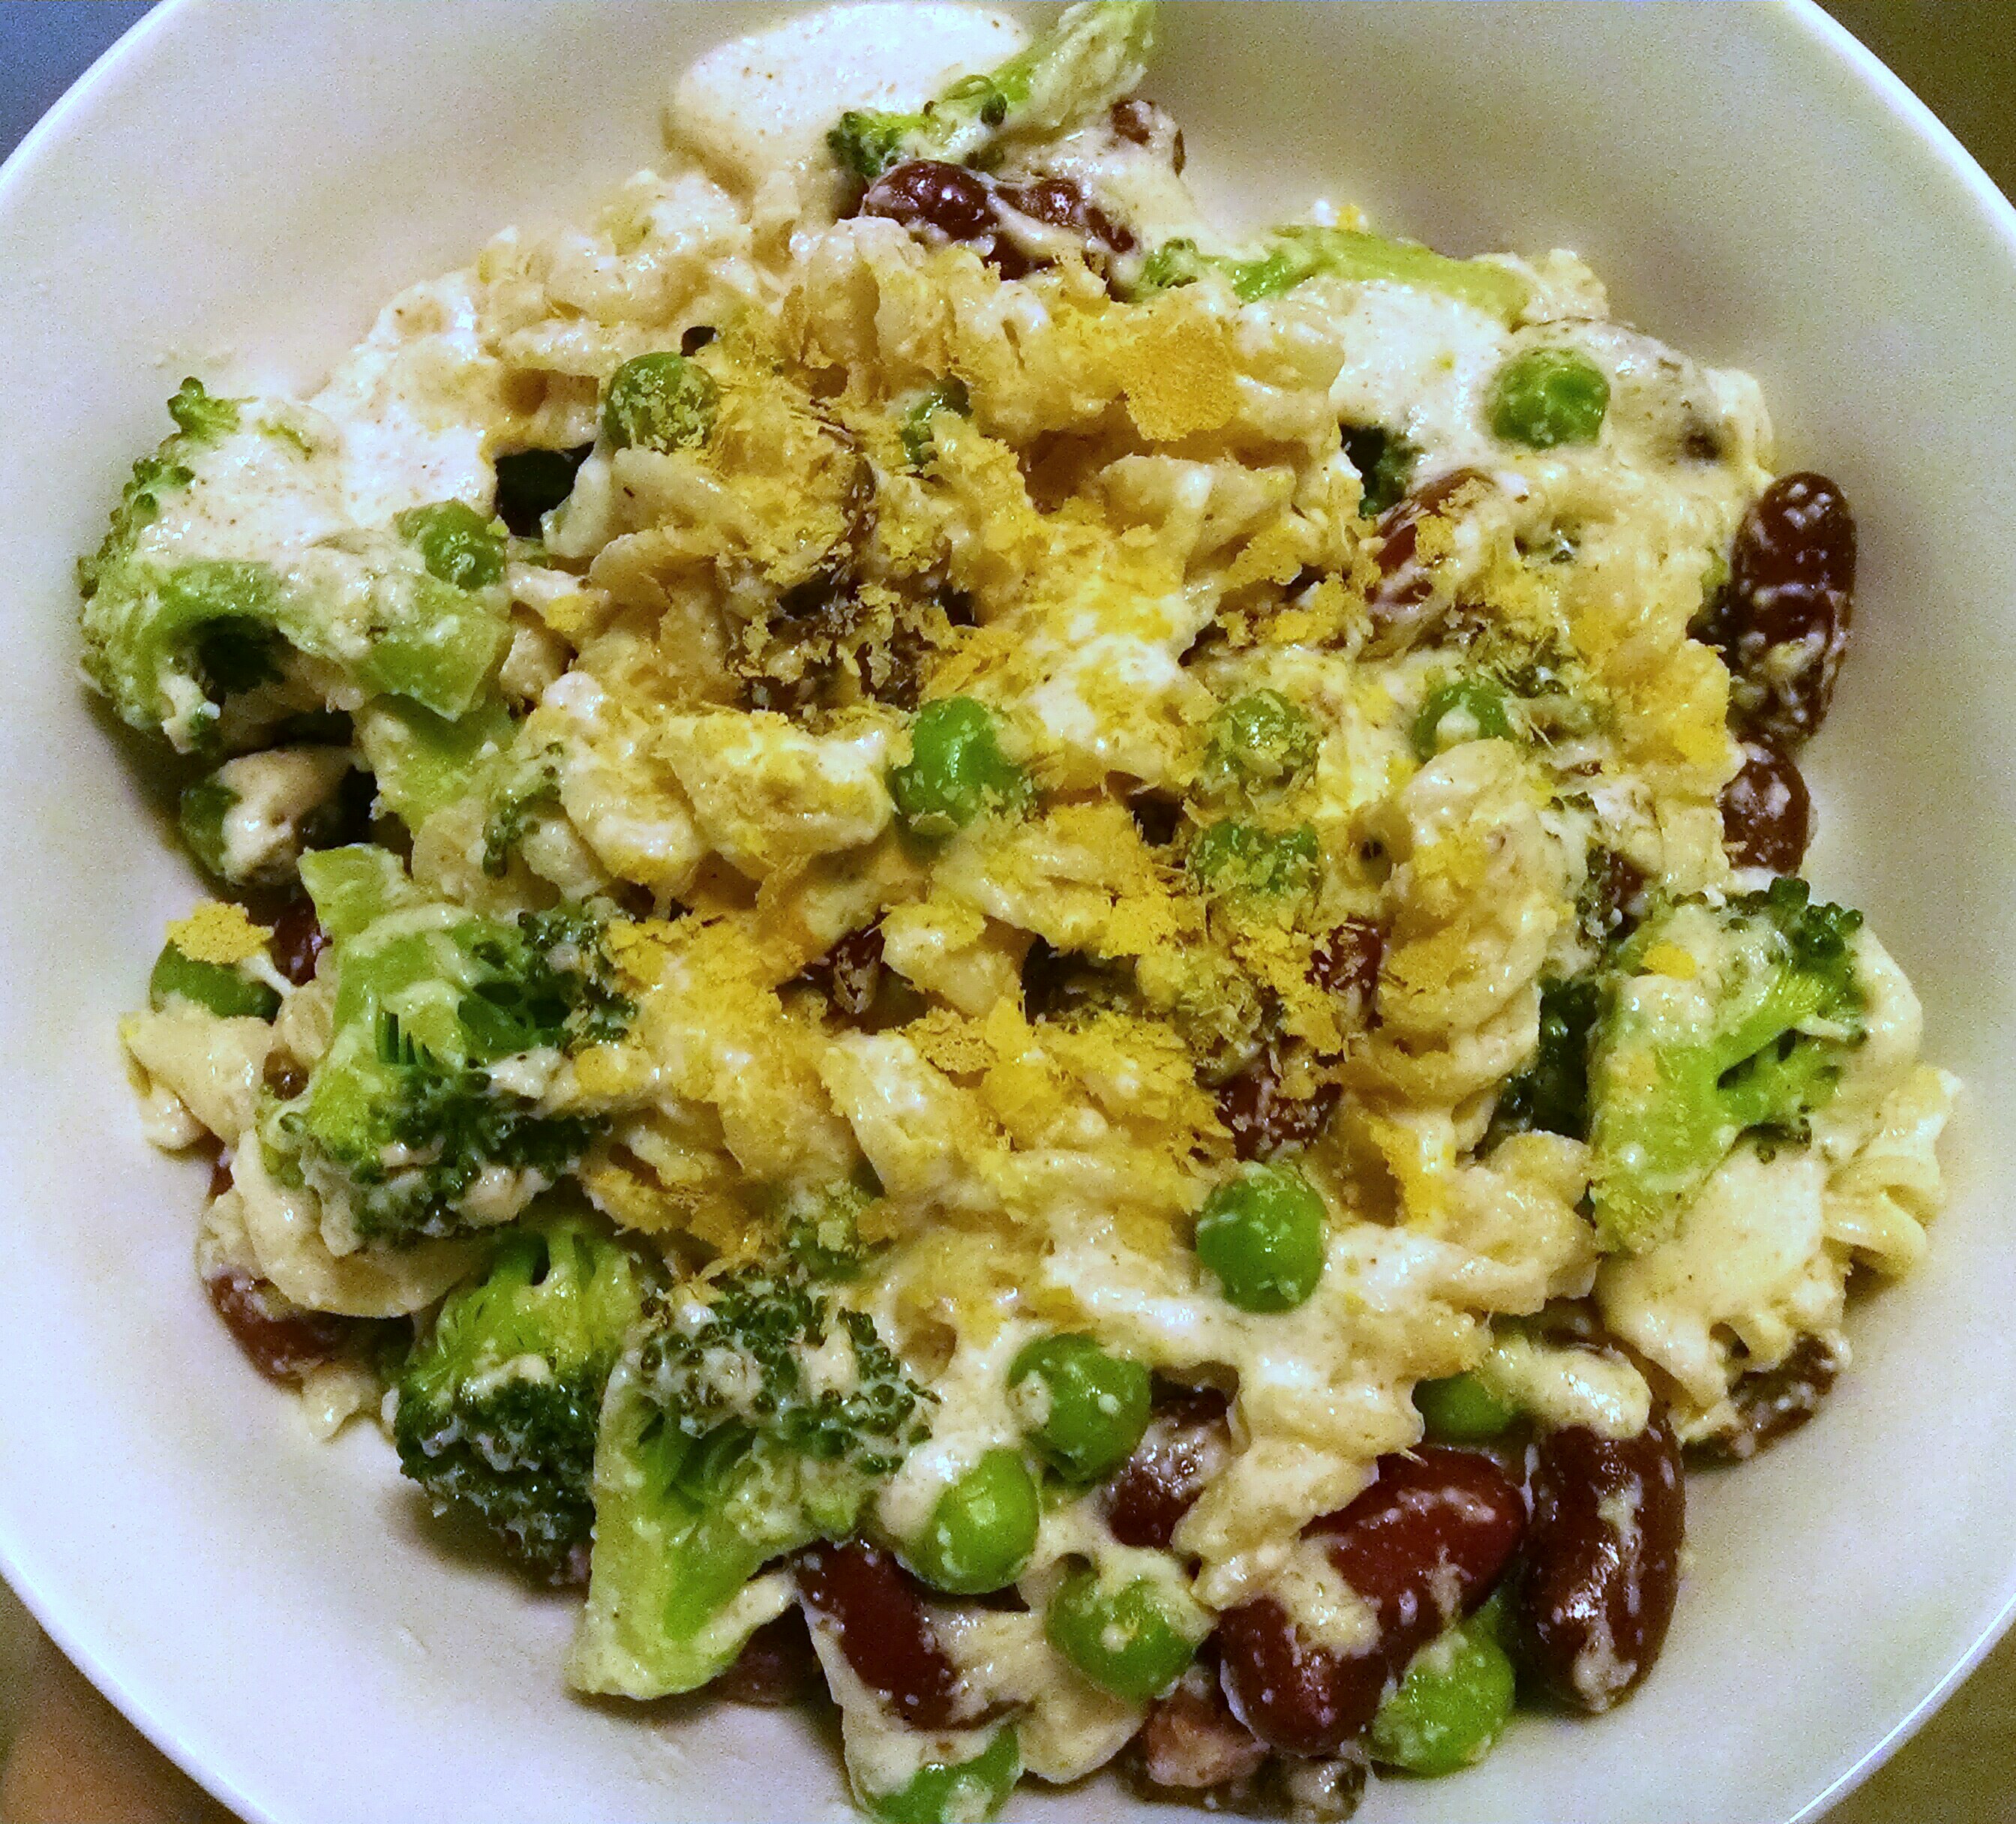
This was my dinner tonight 🙂 SO GOOD!!
It consisted of:
- Gluten-free rice pasta
- Broccoli
- Crimini mushrooms
- Peas (frozen)
- Kidney beans (low-sodium, canned)
I cooked my pasta and used the water to make my sauce…Next I sauteed the mushrooms and broccoli until slightly tender. Then added peas and kidney beans to warm up. Lastly, I added back in my pasta and sauce, tossed together and top with a little nutritional yeast and/or Vegan Parm.
**I had leftover sauce and am not upset about that at all 🙂 Just keep refrigerated.
Eat. Enjoy. Love.
Zucchini Pasta w/ Carrot-Walnut Sauce
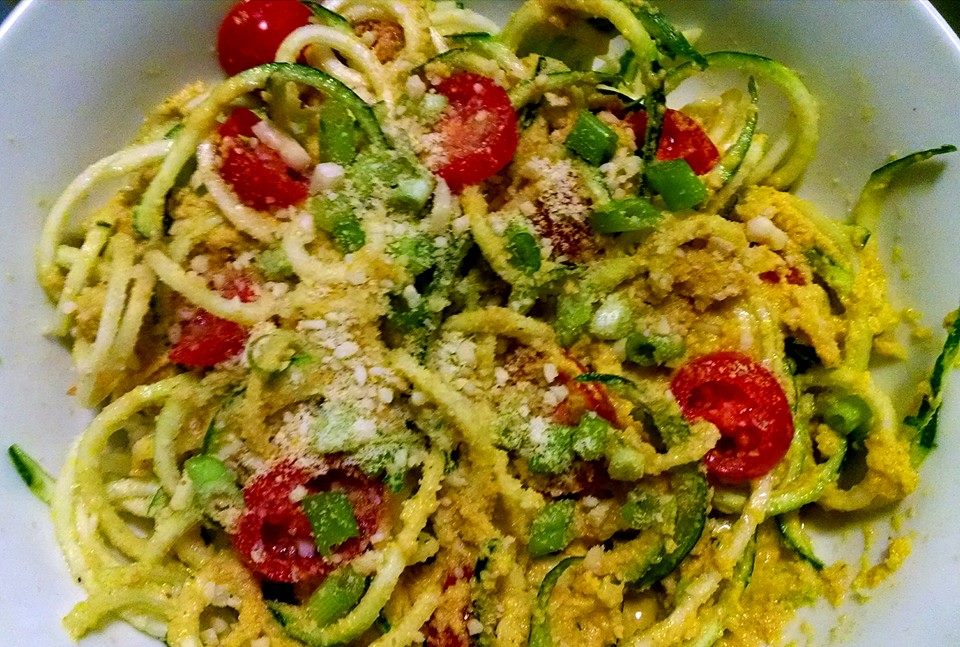
This is Vegan. This is even Raw. Mainly, this is fast, simple, and DELICIOUS. The man of the house even requested a 2nd helping he loved it so much!!
I love experimenting with all types of foods and lately have really been enjoying vegan items and recipes. I am experimenting more and more with vegan cooking & baking so more recipes will be coming your way!! This was very simple & quick to make; in fact the part that took the longest was twisting the zucchinis through my spiralizer (noodle-maker for veggies…if you don’t have one, GET ONE!!). The sauce; about 1 minute, tops!!! I know you are going to love this!!
We ate ours cold, but I think it would also be amazing hot…which would take away the “raw” aspect, but hey, vegan is kick-a%$ all by itself 🙂 I think next time I will eat it hot, myself, in fact!
Ingredients:
**this makes 4 servings**
SAUCE
- 8oz carrots
- 1.5oz walnuts (toasted if not going for “raw”)
- 1/2 cup water
- 2T extra virgin olive oil (another oil could also be substituted, if desired)
- juice of 1 lemon
- 3/4tsp garlic powder
- 3/4tsp onion powder
- 1/2tsp salt (more can be added later, to taste)
- a handful of parsley (other herbs can be used also, if desired)
PASTA
- 4 zucchini, made into noodles
- 1 cup cherry tomatoes, sliced
- 1/2-1 bunch scallions, chopped
- extra chopped walnuts or Vegan Parm for toppings
In a high-speed blender, combine all the sauce ingredients and blend until smooth (you can add more water if too thick). Add more salt, to taste, if desired.
Pour over the zucchini, tomatoes, and scallions in a large bowl and toss to combine.
If desired, top with vegan parm and/or extra chopped walnuts.
Eat. Enjoy. Love
*******Some variations I recommend********
- Toast the nuts used for the sauce
- After blending, heat the sauce in a pan and, once heated to desired temp, pour over pasta and toss together
- Swap the parsley for cilantro and add 1/4-1/2tsp (or more if you like spicy) cayenne pepper
- Experiment with various nuts, herbs, & oils!!! Carrots go well with so many flavors your options are endless!! Get creative and have fun!!!
- Heck, while we are being creative, try using parsnips instead of carrots.
Ok…I am done with the options…for now 😉
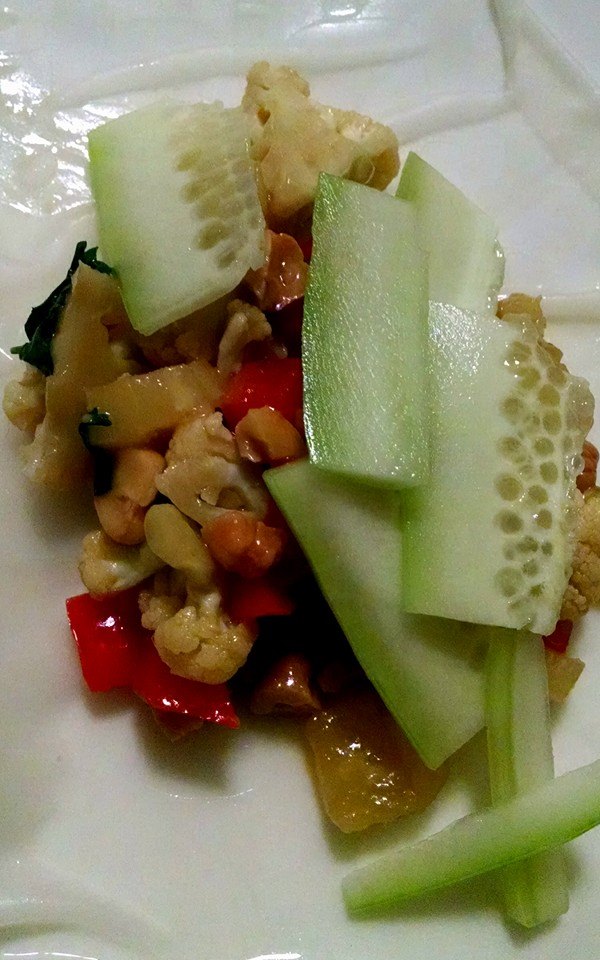
Ginger Cauliflower Spring Rolls
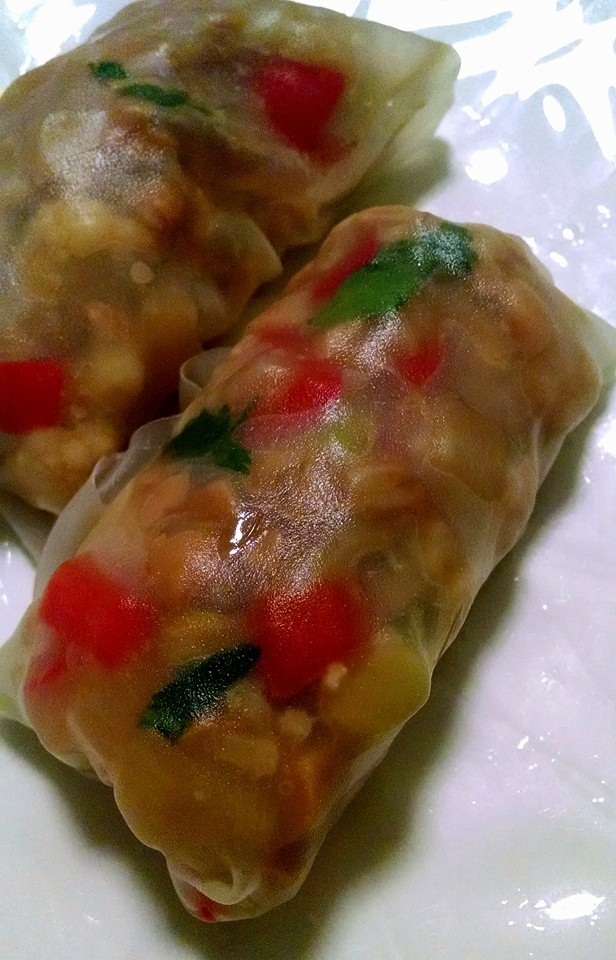
These. Are. Amazing!!!! They are also healthy and satisfying and, believe it or not, vegan!! Don’t let that V-word scare you off…I have no doubt that you could feed these to any person you know and they would absolutely love them!!!! The ginger and garlic give such a nice spice to the dish and it balances so well with the sweetness from the red bell pepper and pineapple…mmmm….just delicious!!!
You could also just make the filling and eat it over rice or noodles (rice, yakisoba, etc) if you don’t have spring roll wrappers or just want it to be a faster process 🙂
Ingredients:
- 2 teaspoons cornstarch
- 2 tablespoons toasted sesame oil
- 3 garlic cloves, minced
- 2 tablespoons grated fresh ginger
- 1 medium head cauliflower cut into tiny (1-inch) florets
- 1 red bell pepper, diced
- 3 tablespoons tamari or low sodium soy sauce
- 1/2-3/4 cup roasted and unsalted cashews, roughly chopped
- 1⁄2 cup pineapple, diced
- 1⁄3 cup chopped fresh cilantro leaves
- 1/2 cucumber, sliced into thin spears or diced into small pieces
In a small bowl, whisk 1⁄4 cup water with the cornstarch until smooth. Set aside.
Heat a large wok or skillet over medium-high heat. When the pan is hot, add the sesame oil, garlic, and ginger. (Warning: ginger will sputter) Stir-fry until you can smell the garlic and ginger sizzles, about 1 minute.
Add the cauliflower, bell pepper, and tamari or soy sauce; raise heat to high, and stir-fry for 3 minutes.
Add the cornstarch slurry (stir to re-dissolve, if necessary) and the cashews and cook until most of the liquid has evaporated and the florets have softened but still retain an al dente bite, about 5 minutes longer, stirring in the pineapple during the last minute of cooking. Remove from heat and mix in the cilantro.

Now, you can just eat it like this or over rice or noodles with the cucumbers used as a topping that gives it a nice cool crunch. Sriracha is also a nice addition if you like spicy food!!
Or you can roll it up into a spring roll like this!! Place some filling in the middle of the wrapper, top with some cucumber and roll it on up!! 🙂
Vegan Strawberry Banana Ice Cream

I try to consume very little to no dairy…mainly just because I think other alternatives are healthier and taste better (almond milk…mmmm!!). AND it gives me the opportunity to experiment with new flavors, ingredients, and ideas which I LOVE 🙂
I was craving something sweet yesterday and I came up with this brilliant idea for “ice cream”. I know you will love it as much as we did and kids would go crazy over it!!!! Oh…did I mention it is healthy?? How about that it took me less than a minute to make?? Well both are true and I can’t wait to try more varieties!!
Last fact: It is raw in addition to vegan 🙂
Ingredients:
- 1/4 cup raw almonds
- 1/2 cup cold water
- 3-4 ice cubes
- 3-4 dates (adjust for sweetness of your liking)
- OR
- 2-3 Tbs honey (again, adjust for sweetness of your liking)
- 1/2 tsp vanilla extract
- 6-8 frozen strawberries
- 2 small or 1 large frozen banana**
Put almonds, water, ice, dates (or honey), and vanilla in a high-powered blender (I have and recommend a Nutribullet) and whirl away until it appears white and frothy. Add in strawberries and banana and blend again until all incorporated well 🙂
You can eat it right away or place it in the freezer for 15 minutes if you want a harder ice cream.
**Frozen banana tip/warning: make sure you peel them before you freeze them!!!!! Otherwise you are never getting that peel off!!! Haha I always keep a ziploc of frozen bananas because A. they keep longer and B. its a great addition to any smoothie or shake!
Eat. Enjoy. Love.
